Showing posts with label Designs by Ryn. Show all posts

Wednesday, November 08, 2017

Designs by Ryn for Christmas

Hello everyone, I hope you are doing well.   

Thank you for your much appreciated responses to my question about photo editing software, I will research your valuable input.

I have been in Christmas card 'mode' and below is one that I created using Designs by Ryn's fabulous stamps :) 

The background was created with Brusho powders spritzed with water.  When dry I over stamped with Celtic Star 2.   I stamped & embossed Seaweed Set around the background with a white & glitter power which created nice branches for Christmas :)

The ornaments were created using Brushos on Spellbinder die cuts which I stamped with a couple of images from Celtic Star Set.   The little hanger die cuts are from a Memory Box set.

I added a little holograph circle sticker in the center of the ornaments.  I wanted to add some nice bling but I was keeping this one flat for mailing.


Thanks for stopping by.  I will get back around to your blogs soon but  life around here is still unusually busy.

Shirley

Thursday, June 22, 2017

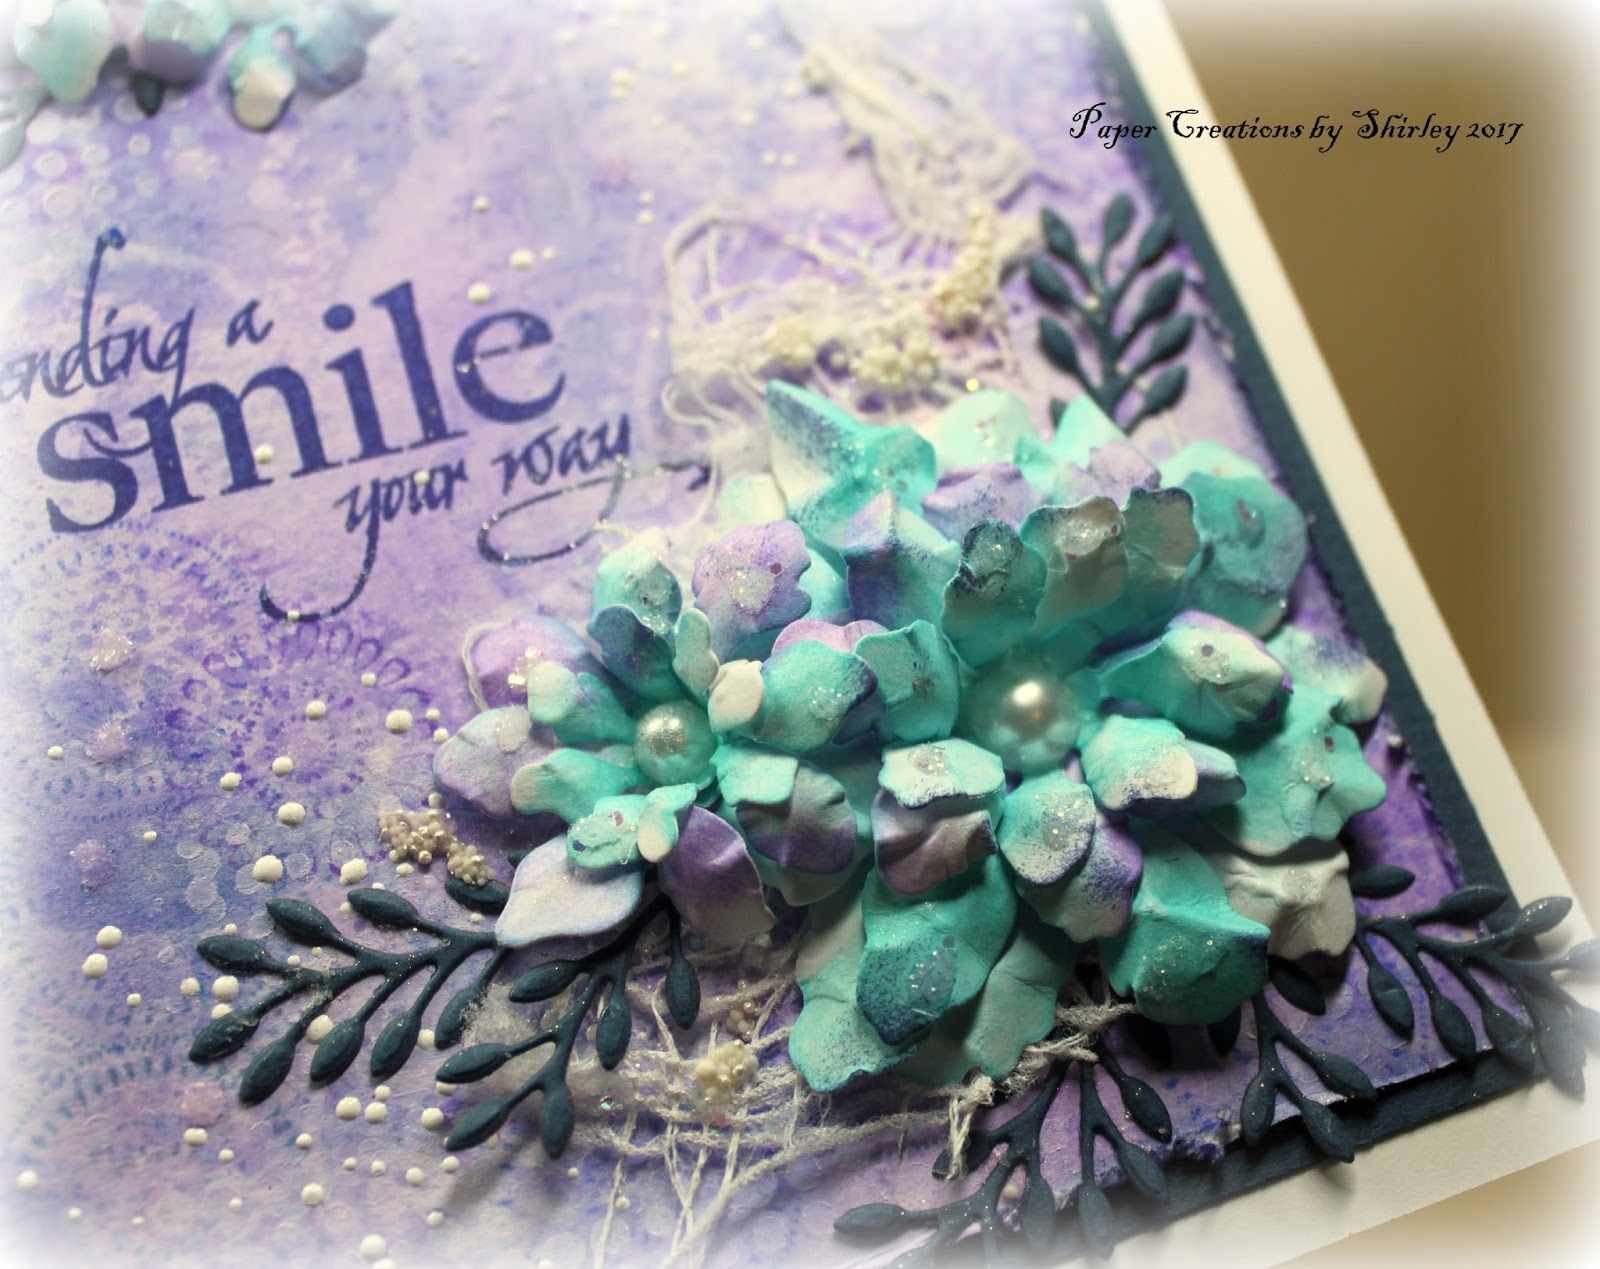
Sending a Smile

Hello everyone, I hope you are doing well.

We are still in packing mode here but I have another card to show that I created recently (before my craft studio was packed up) using Heartfelt Creations Tattered Flowers and Creative Expressions Leaf dies.


The background was created with Distress Inks & water, stamping with water, stenciling with white paint, sprinkled and heated white embossing enamel and gauze painted with Gesso.   I also stamped the background using Design by Ryn's Circle Cluster stamp set.   The sentiment is by Chocolate Baroque but it seems to be discontinued.    Using glue, I added a little Prills and glitter here and there.

The flowers were coloured with Distress Inks, spritzed with water and molded on the back with a stylus and foam mat.


Thanks for your visit, have a great day,
Shirley

Thursday, November 24, 2016

Gesso Resist Backgrounds

Hello everyone,

I hope you are doing well.   It was warm with summer temperatures on Friday and by Sunday it was below freezing, snowing and very windy.   It's still cold this week but it will get warmer soon. No wonder a lot of us (including myself) are fighting colds.

I was very intrigued with backgrounds that my talented teamie Eileen Godwin created and showed on a recent Facebook post.  Her tutorial (titled Masterboard backgrounds) can be found on Pinterest Part One here and Part Two here.   It's well worth your time to take a look at her blog if you don't already follow her as she posts lots of gorgeous designs here.


I followed Eileen's video tutorial to create the background.   (I used a stencil with white heavy acrylic paint instead of Gesso) and then blended Distress Inks over top.   I like the 'ghost' effect.    I also sprayed the entire card with Glimmermist when finished.

Design by Ryn Products:  Japanese Anemone stencil and Circle Cluster Set.

Flowers dies are by Crealies (Set of 3 No. 17 and Uno No.17) cut from a piece of Gelli print and the Flourish is by Creative Expressions.

And below is a small card that I made with the left over background.


I also used Design by Ryn's Spiral Branch set to stamp and emboss over the background and very faintly stamped with Water Droplets as well (I stamped with archival ink and then wiped over top to lighten which worked well on the semi glossy side of the paper).  The sentiment is by Impression Obsession.

Thanks for stopping by and Happy Thanksgiving to my U.S. blog friends.
Shirleyx

Sunday, October 02, 2016

Make a Wish

Hello and welcome to October !

I spent time this weekend in my craft room while it's raining out :)    I could have have been making Fall themed cards as I love this season but I'm still into Christmas designs.

I also spent two days going through all my stash and have piled up a large collection to give away.   I've been overwhelmed by too much 'stuff' around me and have trouble focusing.  I've heard others saying the same thing.  I'm keeping what I think I will use, it still seems like too much, but I feel better.   It was a stressful summer for many reasons so it seems I needed this time to clear my space and my mind.  

We sometimes buy things that we are excited about and think we will use, but it ends up sitting on a shelf or in a drawer never seeing the light of day.   While going through everything, I came across a dozen bottles of Liquitex Acrylic ink that I bought over a year ago.   I was able to 'play' with them while at a stamping event in the Netherlands and rushed out to buy them when I got home.   They have sat on my shelf as I tend to reach for Distress Inks or Dylusions sprays when creating backgrounds.

Today I pulled out the acrylic inks for a play.     I created several pieces of backgrounds, only one sheet went into the recycle bin.   I used one piece for the card below:


I dropped the the acrylic ink on glossy card stock and spritzed with water, which creates a lovely effect.  They can be added in layers after drying without blending since they are acrylic.

I over stamped using Designs by Ryn's Snowflake Set and Patio Stone  (also available in the unmounted Textures set).    The other circles are from IndigoBlu - Limor Circles.    I also used a stencil with white acrylic ink to create tiny circles.

Thanks for stopping by and have a great week,
Shirley

Saturday, July 30, 2016

ATC Swap

Hello everyone, I hope you are doing well.  It's a long weekend here, as it's a civic holiday on Monday, lots of people are enjoying a mid summer's vacation.  It continues to be very hot and humid, I'm not a 'hot weather' girl, I prefer moderate temperatures.  But eventually our bodies adjust and we don't notice it as much and balmy evenings on the deck or patio are wonderful.

Recently I took up a talented artist's, Win Dinn, from Western Canada offer to swap ATCs.   I was looking forward to seeing her art in miniature format as I know she uses lots of texture in her mixed media.

Well to my surprise I received 4 ATCs and many pieces of fun texture art that I can use on cards or mixed media pieces.     Thank you again Win !


Below is the ATC that I mailed out to Win.  I used a Gelli print and a Hummingbird stamp by Designs by Ryn


Stamps by Designs by RynLeafy Branch and Perching Hummingbird.  Ryn's stamps are also available in unmounted sets at a very good value.

I sent along this card (below and seen in a prior post) with the ATC.


Thanks for stopping by and have a great weekend,
Shirley

Wednesday, July 13, 2016

Beautiful Moth

Hello everyone, I hope all is well.

I have a card today using a stencil and stamps by Designs by Ryn, including one of her amazing water designs.  There are some 'copy cat' companies out there, but Ryn's water stamps are a very high quality and I think the most realistic design.

I truly don't understand how some business owners feel that it's 'OK' to steal someone's designs, it's just morally wrong.   I understand that a stamp company may see an opportunity in the market for water designs and create stamps using their own drawings, which is the legal and ethical way to conduct business.  (they are out there).    However, stealing ideas and designs from a sweet young lady who is managing a small business on her own is just so wrong.    We all should know that stealing anything from anyone is wrong.

I could say more, but I'm now off my soap box, rant is over. 


I started by using Maidenhair Fern stencil with molding paste.  When dry I sprinkled Brusho ink powders, spritzed with Gold Glimmermist and let it run.   I like how the gold mica gathered around the raised image.

Lucine the Moth was stamped on separate cardstock, coloured with inks and cut out to attached.  I also stamped Hanging Droplets in the background and added the die cut word by Tim Holtz (Sizzix).  Ryn's stamps are also available on unmounted sheets at a very good value.

Below is a close up where you can see stickles on the Moth.


Thanks for stopping by and have a great day,
Shirley

Wednesday, June 29, 2016

Friendship gives Wings to the Heart

Hello everyone, I hope you are doing well.     We are experiencing drought and heat but today is a little cooler.    

I have a card to show today using beautiful stamps by Designs by Ryn.  The quote is by Chocolate Baroque.


The background is Distress Inks and a lovely stencil with vines, but it doesn't have the name on it, I can't recall what company it's by.

Designs by Ryn stamps:  Leafy Branch, Streamertail Hummingbird, and Flower Lace (background of bottom).   I used a stencil with small circles and white acrylic paint here and there.  I coloured the bird with Distress Inks and highlighted with a white pen.

Chocolate Baroque stamp:  Quote is from Pretty Poppies set.

Thanks for stopping by and if you live in Canada or the USA, enjoy the upcoming long weekend :)
Shirley

Sunday, June 05, 2016

Hummingbird and Cornflowers

Hello everyone, I hope you had a a great weekend.    We are getting much needed rain here today, so a perfect time to play in my craft room :)

I used Designs by Ryn's stamps and Creative Expressions Dies for my card below.   I think I have lots of different flower dies, but when I saw this whimsical Cornflower Set by Sue Wilson of Creative Expressions, I couldn't resist.  I think they compliment Ryn's Circle Clusters set.
 

The background started with Distress Inks (Citron, Mowed Lawn and Peacock) on my craft mat, spritzing water and then dragging mixed paper through.   After drying with a heat gun I stamped Circle Clusters with water - a technique that Miranda demonstrates at her tutorial here.

When the background was dry again I over stamped with Mowed Lawn Distress Ink using Circle Clusters and highlighted with a white gell pen.

The beautiful Booted-Racket tail Hummingbird which is also available on Ryn's unmounted Hummingbirds 2 sheet was stamped with Memento Ink, coloured with Distress Inks using a brush and water on my craft mat and Prisma pencils.  I also highlighted with a white gell pen.

Happy Birthday is from Chocolate Baroque's Amazing Birthday clear set which I can no longer find on their website.

I blended Peacock Feathers Distress Ink on the tips of the Cornflower die cuts.   Creative Expressions Dies:  Coneflowers CED1424 and Olive Branch CED1460.  


Thanks for stopping by and have a great week,
Shirley

Monday, April 25, 2016

Crealie Flowers, Damask background and Ryn's Waterdroplets

Hello everyone, I hope you are doing well.

I've had a lot going on and when my energy is gone so is my mojo for creating but I enjoyed some time in my craft room yesterday afternoon. 

I used favourite colours, Crealie dies, stamps by Chocolate Baroque and the amazing water droplets by Designs by Ryn to create the card below.  


I started with Distress Inks (Violet and Citron) on an Acrylic plate and spritzed with water to create the background.  I also sprinkled a little Brusho powders, spritzed more water and let it run over the inks.    I over stamped with using the same inks and a couple of stamps from Chocolate Baroque's Dusky Damask set.

I stamped Designs by Ryn's water droplets from the unmounted Textures Sheet with Cobalt Versafine ink. 
I removed some of the ink from the water droplets by dabbing water over top with a brush and blotted with paper towel.  Next I added some colour back, dried with a heat gun and highlighted with a white pen.

It's so much fun to create the flowers using white cardstock.  I used the following Crealie Dies:  Uno No 17 Flower 11, Set of 3 No 17 Flower 11, Duo Set No 20 Swirls, and Double Fun No 12.  Using finger daubers and Distress Inks I coloured and then molded them using a stylus and foam mat.

The matting is navy blue and not black as appears in the photo.


Thanks for stopping by.
Have a great week,
Shirley

Monday, January 25, 2016

Floral Postcard

Hello Crafters, I hope you are doing well, January seems to be flying by. 

I've finally used a beautiful Crafty Individuals stamp that was sent to me a while ago as a thank you gift from the Craft Stamper magazine (when a card was published).  


The background started with Dylusions spray inks, spritzed water and blotted with a paper towel.  I over stamped using crackle, lettering and water droplets stamps.   The main image was stamped onto glossy cardstock and coloured a little with Tombow markers and highlighted with clear Wink of Stella (which you cannot see).

Stamps:  Crafty Individuals:   Floral Postcard CI-302, Designs by Ryn:   water droplets are from Textures unmounted set,  Impression Obsession:  CC069 Craquelure (crackle), Penny Black:   199L Lettered Background.

Dies:  Crealies Set of 3 No 3 (flowers, CL CS 23 (leaves) and Die-Namics Fancy Flourish small.

I coloured the die cuts with Distress Inks and molded the flowers using a stylus and foam mat by McGill (Paper Blossoms sets).

Thanks for stopping by and have a great day,
Shirley

Thursday, December 17, 2015

Hello... with Water Effects and Tim Holtz Stencils

Hello everyone... Writing 'hello' makes me think of Adeles' fabulous new song :)

Another break from Christmas designs today.   This one features Tim Holtz stencils and Design by Ryn's water effects stamps.

The challenge this month at Fashionable Stamping Challenges is "Make Your Own Background" so I am joining in again with this design. 


The background started with Distress Inks (Festive Berries, Wilted Violet and Blueprint Sketch) using an acrylic plate and water.   I blended Wilted Violet DI over top using Tim's Latticework stencil.

The flowers were created with Tim's Wildflower stencil.   I used molding paste over the stencil and sprinkled holograph glitter over top while wet.  After it was dry I added ink with a Versamark pen, and embossed with white powder.  It has a lot of texture that's difficult to see in the photo.

I stamped Designs by Ryn's Trickling Water 2 (also available with the unmounted Trickling Water 2 set) and little droplets from the unmounted Textures Set with purple Memento Ink and added white highlights.  I also used the Letter Background stamp by Penny Black (that I've had for ages and still love) here and there in the background which again is hard to see in the photo.  And to finish it off I splattered paint and embossed little a little silver Frantage embossing enamel.

Hello is from Impression Obsession which was stamped on a little die cut tag.

Thanks for stopping by and have a great day,
Shirley

Thursday, December 10, 2015

Turquoise Tattered Poisettia

Hello everyone, I hope you are doing well during this busy season.     We are enjoying milder weather than normal but I would like to see the sun a little more.   December is usually a dreary month but with the cold weather in January the sun comes back.

I have a Christmas design to show that was a lot of fun to create.


Background:  Dylusion spray inks and with stencilling and stamping using Chocolate Baroque snowflakes.

Stencils:  Tim Holtz Christmas Words THS030 (with Krystal Viva Gel) and Poinsettia THS049 with Distress Ink

Dies:  Sizzix (Tim Holtz) -Tattered Poinsettia 658261 and Holiday Greens 658759, Impression Obsession- Reindeer DIE228-G,  Memory Box- Winterberry Sprig 98732

I embossed the reindeer antlers and the branches with silver embossing power.  I painted the reindeer with Viva 3D stamp paint.  The Poinsettia was stamped with Design by Ryn - Sea Bubbles, coloured with Distress Ink and a coat of Distress crackle paint added.


Thanks for stopping by and have a great day,
Shirley

Thursday, December 03, 2015

Hummingbird with Blues & a Holiday Gift from Designs by Ryn!

Hello crafty people, I hope you are doing well during this busy month of December. 

I have a design in blue today, featuring another beautiful Hummingbird from Designs by Ryn.   I am not happy how this one photographed so I cropped this first photo.

 
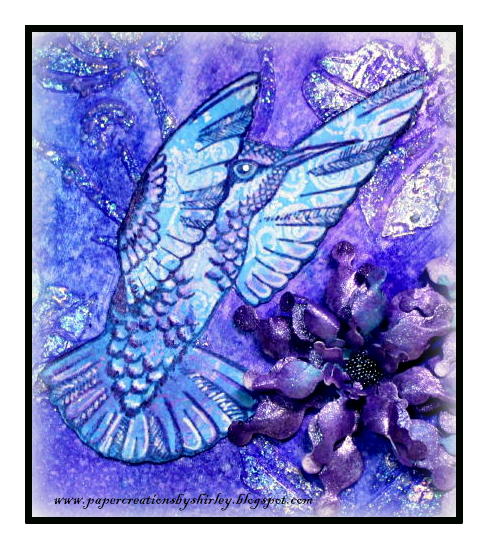
The Hummingbird available on Designs by Ryn's Hummingbird 1 unmounted sheet was stamped onto a Gelli plate print hanging out in my stash and coloured a little with Tombow markers. 

I tried many times to get a proper photograph but will show you the entire design below.   The colours are not showing properly and the glimmer and sheen is making it look 'off'.   You will have to trust me that it's much better IRL.


The background is Dylusions Inks.   I used Ryn's Japanese Anemone stencil with Viva Kristal Gel and Inka gold rubbed over top.  The Crealie Flowers are painted with Viva 3D stamp paint (more glimmer). 


You can see the flowers better in the photo above.  Crealie Die:  Creative Flowers CLCF15.


Good news from Designs by Ryn... she is giving away a free Flowing Branches stencil as a holiday gift with every order placed in December.  No minimum order, no coupon codes required, just place an order for one or more of her fabulous stamps and/or stencils and she will include this holiday gift. :)  Happy dance !


Thanks for stopping by and have a great day
Shirley

Thursday, November 12, 2015

Friendship gives Wings to the Heart

Hello everyone, I hope you are having a great week.

I have a design today that features another gorgeous Hummingbird from Designs by Ryn and a couple of her amazing water effects stamps.


Background:  I blended Twisted Citron, Mowed Lawn and Cracked Pistachio Distress Inks using an acrylic block and water.   I added Fozzilized Amber and Mowed Lawn DI with Design by Ryn's Japanese Anemone stencil.   I also used a small Magenta dotty and Ryn's Flower Lace stamps with Mowed Lawn but it's hard to see the lace.

Main images:  I used VersaFine, Olympia Green, for the main stamping.  I stamped the Hummingbird from  Hummingbird 1 unmounted sheet separately, coloured with Tombow markers, cut him out and attached.   I also stamped with Ryn's Hanging Droplet Set and Trickling Water 2 which are available mounted individually or in unmounted sets. 

The sentiment is from Chocolate Baroque's beautiful Pretty Poppy stamp set. 

TIP:  How to make Designs by Ryn's water effects stamps appear more 3D:
  • Stamp the image with permanent ink
  • Brush a little water over top of the droplet area
  • Blot water off with a paper towel to remove some of the colour.  I used Distress Inks in the background which are water soluble and will lift up with water and paper towel.
  • When dry add highlights with either a white Gelly Roll, Uni-ball or Acrylic pen.  On the card above I used a Molotow white acrylic paint pen than Ryn recommended at her Facebook Page.
  • Sometimes I add a little colour back into the water droplets but I did not above

Thanks for stopping by and have a great day,
Shirley

Tuesday, November 03, 2015

Green and Yellow Christmas

Hello everyone, I hope you are doing well.

I have a few more Christmas cards to show you.  Again I created a large sheet for the background, chopped it up and started stamping :)


The background stamping above includes a small Poinsettia by Magenta and Winter Berries by Penny Black.  Merry Christmas is from Chocolate Baroque.   I stamped on the Tim Holtz Tattered Poinsettia die cuts with Design by Ryn's Sea Bubbles to create some texture.  The 'greenery' is from a McGill punch -Designer Pine .


The background stamps above are from Designs by RynSnowflake Set and again the Sea Bubbles which I like to use for 'snow'.   I added ornament Die cuts by Memory Box that match the Sea Bubbles and is the reason why I 'had to have it'.   I used again the same sentiment by Chocolate Baroque.


Again the small Poinsettia by Magenta is in the background along with Holly by Impression Obsession.  Peace and Joy is from a Penny Black set.  The star die cuts are by Memory Box. 

Thanks for stopping by and have a great week,
Shirley

Friday, October 30, 2015

Playing with Acrylic Inks

Hello creative people I hope you are doing well.

I was playing with Acrylic inks on a tag and ended up adding one of Designs by Ryn's beautiful birds from her Hummingbird 2 unmounted set.


I added copper acrylic paint using Ryn's Maidenhair Fern stencil and white paint using a Memory Box dotty stencil over the background of acrylic inks.   The black circles were 'stamped' with a small empty bottle and black acrylic paint.

I coloured the Hummingbird with Tombow markers, cut him out and added white highlights with a pen.

Thanks for stopping by and have a great weekend.
Happy Halloween!
Shirley

Thursday, October 08, 2015

Not only at Christmas

Hello everyone, I hope you are doing well.
 
I have been working on a lot of Christmas cards recently and keeping them flat for mailing.  Postage is getting expensive, especially overseas, and if the cards have a lot of layers and rhinestones the cost is the same as a small package.

I have a few to show today using Design by Ryn's Snowflake set and a lovely Impression Obsessions' sentiment - 'Not only at Christmas'. 


The background (above) was created using Raspberry and Coral Distress Inks.   I made a stencil from a Memory Box die and blended more ink over top.   I stamped with Designs by Ryn's Snowflake set and then added some die cuts by Memory Box.  Instead of rhinestones I added holograph stickers to the snowflake centres to keep it flat.


The next two are in the 'Shirley colours', a favorite colour combo but I do love other colours as well :)


The background (above) again is Distress Inks and I used a stencil that I made with a Memory Box die and Distress Ink.  I didn't use Ryn's snowflakes on this one, but over stamped with Penny Black's Star Poinsettia and added some gold enamel embossing.  The snowflake die cuts are by Joy Crafts.  Again I added holograph stickers to the snowflake centres.


The background (above) was created with Peacock Feathers and Citron Distress Inks.  I stamped over top with Design by Ryn's Snowflake set with the same inks and embossed Seaweed set with gold glitter powder.  The die cut is from a Memory Box - Holly Holiday Frame set.

Happy Thanksgiving weekend to my Canadian followers.
Shirley

Tuesday, September 29, 2015

Time Flies

Hello everyone I hope you are doing well.

I love this time of year, the colours are gorgeous, the air is fresh and it's much cooler.   But for sure 'time flies' and we should enjoy each moment.   

I have a fall card to show today for Designs by Ryn, again using her beautiful Hummingbirds.  This one took a long time as it changed constantly and at one point it was going into the recycle box.  However I decided to keep it as I kept 'messing around' with the background and birds.


The background started with Raspberry and Coral Distress inks using water on an Acrylic Sheet.  Next I stamped using Maple Leaf, but it's a bit lost into the background.   I stamped Leafy Branch in the background but it's also hidden under white paint (using a stencil).  But that is what's great with Acrylics and mixed media, you can build up the layers and just have a peek of something else underneath.  .  

I won't put you to sleep with the description of all the changes.  I ended up stamping the birds on water colour paper, colouring with Tombow markers, a little Distress paints,  fancy cut and glued to the background.   I also added a little clear Wink of Stella on the birds.

Designs by Ryn Hummingbird stamps:  Hummingbird 2 unmounted set or you can also buy them mounted individually Boot Racket-tail Hummingbird and Perching Hummingbird

The leaf die cuts are from Impression Obsession and coloured with Glimmer paint.  The sentiment was a free stamp received while in the Netherlands stamp event from Art Journey.


Thanks for stopping in at my blog and have a great day,
Shirley

Tuesday, September 15, 2015

More Hummingbirds :)

Hello everyone, I hope you are doing well.    I haven't had time in my craft room lately however today the beautiful Hummingbirds by Designs by Ryn were calling me from my desk where they have been sitting.

For a change I've used purples instead of the blues and greens that I used in the last three designs, so maybe these birds no longer look like hummingbirds.  This design isn't as dark as my photo, but purples sometimes are difficult to capture. 


I used Distress Inks and water on my craft mat to start and dragged mixed media paper through it.  When dry I used Ryn's Maidenhair Fern stencil with white acrylic paint and then Peacock Feathers Distress Ink over top.  I added some circles with acrylic paint and the cap off a little glue stick.

Designs by Ryn stamps used:  Hummingbird 2 set, Rain Drops, Texture - Unmounted Set (Water Droplets and Circles Custer).  I coloured the birds with Prisma pencils.

Thanks for stopping by and have a great week,
Shirley

Monday, September 07, 2015

Red Tailed Comet Hummingbird

Hello everyone, I hope you are doing well.

I have another Hummingbird design using Designs by Ryn's gorgeous new Hummingbird 2 unmounted set.  This one is a Red-tailed Comet Hummer but as you can see his tail is not red :)


The background is a little busy but I had fun playing around.  I started with Distress Inks on an acrylic block spritzed with water.  Using the same inks, I over stamped with a flower from the Hibiscus unmounted set.  I added some circles and stenciling using white acrylic paint.   I also added some chunky gold enamel by heating underneath.

It's hard to see but I used a couple of stamps at the top and bottom from Chocolate Baroque's Wisteria Lane set using the purple Tom Bow marker direct to the stamp.

I coloured the bird with Tom bow markers.  The die cut flowers are by Crealies - Set of 3 - Flower no. 3 also coloured with the same purple Tom Bow marker (by rubbing on craft mat and spritzing water and dragging the flowers through).

Thanks for stopping by and have a great week,
Shirley