Saturday, December 29, 2012

Rose Heart

Hello everyone !    I hope you are still enjoying the holiday season.    It's been snowing here and I'm enjoying seeing the winter wonderland from my craft room, so pretty !

Chocolate Baroque just released several new stamp sets.  Today I have a card using January's Stamp of Month set -  Rose & Thistle.   Again the creative possibilities with these beautiful & elegant designs are endless.  This set will certainly will make lovely Valentine, Wedding or Anniversary cards & more.

I'm joining into the Challenge over at Simon Says Stamp - Anything Goes with this card.


I created the background with watercolour paints spritzed with water to blend.     The Flower Fragment from the Textured Fragment set was stamped with Mowed Lawn Distress Ink.   You Inspire Me is from the Words of Inspiration set that is one of the wonderful word sets currently on special!   I stamped the Rose Heart from the Rose & Thistle set separately on white cardstock, coloured with my Prisma Pencils, cut out and adhered as shown.    I also added a little glitter that is hard to see in the photo.

Here is a look at the Roses & Thistle set


Thanks for your visits they are appreciated !    If you would like to see more designs from the new stamps please visit Chocolate Baroque's Design Team Blog.

Wishing you a happy, healthy & creative 2013 !
Shirley

Wednesday, December 26, 2012

A Purple Steampunk Butterfly

Hello Everyone &  Happy Boxing day !    I hope you are enjoying the holiday season.

I'm back with another Steampunk Butterfly from Chocolate Baroque.    I've used Dylusions Inks again in combination with a Crafters Workshop Stencil. 


I used Crushed Grape & London Blue Dylusions on the background.   Next I blended Chipped Sapphire Distress Ink with Crafters Workshop Mini Gear Stencil.  I over stamped with the Gear Fragment with navy chalk ink. 

I embossed the Steampunk Butterfly with black and used Dylusions to colour.  I use a fine tip water brush for some of the detail.   'Because I care' is from the beautiful Pretty Poppies set.

Again I would like to thank all my followers & visitors for all your inspiration, visits & kind comments in 2012.   Without you, blogging would not be so rewarding.

I wish you a happy, healthy & creative 2013!
Shirley

Sunday, December 23, 2012

Seasons Greetings !

Seasons Greetings Everyone !   I would like to thank all my loyal followers & visitors for all your inspiration, visits and kind comments this year.    Without all of you, blogging would not be so rewarding.   I also wish you a very happy, healthy & creative 2013!      

I have a few more cards that I wanted to post for Christmas and will join into the following challenges with the first one:
Simon Says Stamp - Anything Christmas
Anything Goes Challenge Blog - #82 Traditional Colours 
Out of Hat Creations - Use Birthstone Colours  I used Feb-Amethyst, May-Emerald, July-Ruby

The first card below was a lot of fun to create using flower stamps from Outlines Stamps (who sadly closed earlier this year).


The background was created using Impression Obsession's Cover a Card- CC039 Lg. Paisley and Fruitcake Kaleidacolor ink.  I used a brayer to ink up the stamp along with IO's Mega Mount.

I embossed Outlines Striped Petals (Medium D658 & Small D659) with silver on green & red cardstock.  I highlighted them with Micacolor Interference Paints.     I added micro beads to the flower centres and added a pearl flourish that was in my stash along with holograph Starform border stickers.


I also have a couple of cards that I created with a pretty ornament stamp by Impression Obsession and  Penny Black backgrounds.   I borrowed this stamp from a friend during a crafty day & enjoyed colouring it so much that I ended up buying one of my own (yes I'm a stamp addict!)


Stamps used on above card:   Impression Obsession - D8295 Ornaments & Penny Black -  (Background) Harmony 40-170 & Christmas Story 40-164.   I used also used Spellbinder Dies.

The background (Harmony) was stamped with Brilliance Pearlescent Purple ink.   The dark green cardstock was stamped with the letter (Christmas story) stamp.  The ornaments were embossed with a gold powder that has a bit of glitter.  I painted them with Stargazer Micacolors.   The card is layered as shown, I added some holograph Starform border stickers.

And here is my 2nd card with the same image below.


Stamps used on above card:  Impression Obsession - D8295 Ornaments & Penny Black - (Background- Letters) Christmas Story 40-164 & Christmas Flourish (Merry Christmas) 3900H.   Again I used Spellbinder Dies.   The background (Letter) stamp was stamped with Wheat Versamark Chalk Ink.   The Ornaments were coloured with Vintage Micacolor paints.  

Thanks for your visit & enjoy the season with family & friends.
Shirley

Thursday, December 20, 2012

Steampunk Valentine

Hello Everyone,  I hope you are enjoying the festive season, it's such a busy time of year !

I have another card using the beautiful new Steampunk Butterfly set from Chocolate Baroque that could be used for Valentines day.    I love these metal roses and my husband thinks that the Steampunk designs work well for 'manly' cards. 


I started with a piece of designer paper from my stash (Basic Grey- Capella) that has a faint vintage style pattern.     I stamped  the wheel/window fragment with Wheat Chalk and then Vintage Photo Distress Inks.  Love is from Chocolate Baroque's Artistic Expression set which I stamped with Fired Brick Distress In.

I embossed  the window fragment along with the metal roses with a metallic embossing powder (combo of silver, gold & bronze). I painted the roses & fragment with Vintage Micacolor paints, cut them out and arranged as shown.  I decoupaged the large rose to add dimension. (I stamped it several times)   Gold keys from my stash were added for a finishing touch.

And here is a closer look:


Thanks for your visit and enjoy the season !
Shirley

Wednesday, December 19, 2012

Vine Heart & Lace

Hello Everyone !  I hope you are doing well and enjoying the time of year.     

I have a card using beautiful Designs by Ryn's stamps that could be used for Valentines Day.


Design by Ryn's stamps used:    Climbing Vine, Vine Heart, Flower Lace 1.

I created the background with red & blue watercolour paints (wet on wet on watercolour paper).  Once dry I embossed the climing vine with black.   Next I stamped the Flower Lace with Seedless Preserves and Salty Ocean Distress Inks.    I used bleach to take colour away from the vines.

I stamped Love (from Chocolate Baroque's - Artistic Expressions) with Black Soot Distress Ink.  The heart was also embossed with black and I used Seedless Preserves to paint in colour along with a blue Tombow.    The heart was cut out and adhered as shown.

If you have a chance, please stop by Miranda's and Eileen's Blogs, both with lots of inspiration,  who are also on Ryn's Design Team.

Thanks for your visit and enjoy the Season !
Shirley

Sunday, December 16, 2012

Christmas Flourish with Holly

Hello everyone,   I hope you are having a great weekend with all the activities at this time of year.  

The beautiful Christmas Flourish stamp set from Chocolate Baroque is on special this week !     The beautiful flourishes are quite elegant (see photo at bottom of this post).   I have two cards today created with these designs, one with lots of gold and the other a CAS one layer card.   


I used blended Taffy (pink) & Snickerdoodle (warm beige) Smooch Inks to create the background.  Next I stamped CB's Holly Snowflake (free stamp with December's Craftstamper Magazine) with Colorbox Gold Pigment ink.   I embossed the Holly background with gold and embossed the sentiment with a Rose powder.   The 'Believe in the Miracle' sentiment is from the Snowflake Flourish set, but it's also available as a single clear stamp.    

I blended Snickerdoodle Smooch Ink around both the Holly background and the sentiment.   I used Spellbinder's S5-090 die for the mat behind the quote.   A matching bow, pearls, matting and it's done!    The layers could be popped up but I left them flat for easier mailing.


And below is a one layer CAS design using the large Holly Flourish from the set which was so quick & easy to make !   I love to use layers & decoupage, but ouch it gets expensive at the post office!  The flourishes are wonderful for clean & simple creations.


I used beautiful smooth purple card stock available at Crop Circles.  I embossed the gorgeous Holly Flourish & sentiment with white and added red stickles for the 'berries'.

And below is the awesome Christmas Flourish set.   The trees will also make great cards !

Thanks for your visit and enjoy your day !
Shirley

Thursday, December 13, 2012

A Hummingbird with Waterdroplets & Texture

Hello everyone, I hope your week is going well.     

It was great fun creating this card with Designs by Ryn stamps & playing with molding paste & Silks acrylic glaze.  I used Ryn's beautiful Flying Hummingbird 2, it's one of my favourites from her collection of Hummers.  I combined him with her popular Water Droplets and you can see her Leaves in the background as well. 

Every time I use the water droplets stamp someone will ask, "how did you create those water droplets?"  Of course the answer is simple,  just stamp them!   It's an amazing design that Ryn hand drew and you will find lots of samples using it at her website.


Design by Ryn Stamps used:   Flying Hummingbird 2, Water droplets & 3 Leaves set.

I started with Blue, Lime & Peacock Dylusions Inks on the background.  Next I used TCW Stencil Mini Solace (TCW331S) and a light molding paste which I painted (when dry) with Silks Acrylic Glaze. (which are beautiful paints with mica powders, you can't see the sparkle in the photo).  I added a lot of micro beads with Glossy Accents in the center of the 'flower'.  I also painted over it with Silks.

Next I stamped 2 different leaves with Mowed Lawn Distress Ink and the Water Droplets with black Stazon Ink.

I embossed the Hummingbird with black, coloured with my Tombows and cut him out and adhered as shown.  I used a very thin black mat and then white cardstock to pop the background colours. 


Thanks for your visit and kind comments they are appreciated !
Have a great day
Shirley

Tuesday, December 11, 2012

Butterflies & Blooms

Hi everyone !  I hope you are doing well, it's been very gloomy here this past week.   But any snow that we had has melted again. 

I have another design using  Chocolate Baroque's new Steampunk Butterfly set.  I've had so much fun with these designs and I'm a "Steampunk Newbie" !   This time I've used the Gear Fragment and the small Butterfly from the set.


I created the background using Dylusions Inks (London Blue and Fresh Lime).  I sprayed the inks, then spritzed water & blotted with a paper towel roll.     I over stamped with the Gear Fragment stamp using Night Sky VersaMagic Chalk Ink.

I embossed a flower from the Bold Blooms set along with the small Butterfly from the Steampunk Butterfly set with brown.   I sprayed them with Dylusions to colour.   I still had some cogs in my stash that I added to the flower centres and around the background.   I used micro beads for the bodies of the butterflies.


If you have time to visit the Design Team Blog over at Chocolate Baroque my team mates are posting gorgeous designs almost every day !

Thanks for stopping by, your visits are appreciated !
Have a great day,
Shirley

Friday, December 07, 2012

Harlequin Christmas

Hi everyone !  I hope you are having a great week during this busy time of year !

Chocolate Baroque is offering weekly specials and starting today it's for the beautiful Harlequin Christmas set.  This was my first Chocolate Baroque set and I still love it.  I'm posting a card that I recently created using one of the stamps which is definitely non-traditional Christmas colours.

I'm entering this card into the current challenge (#9) over at In the Pink as  Sylvia & Christine's theme is  "Gonna be a PINK Christmas" !


I created the background with Picked Raspberry Distress Ink using the Acrylic Block technique (Simply add DI ink to an acrylic block used for cling stamps and spritz with water and 'smoosh' onto your background.  Keep adding ink until you are happy -  it's fun to combine colours).     I stamped the mistletoe fragment background stamp from the  Pears & Bauble set with Smokey Grey Versafine Ink.  I highlighted the berries with a glitter gel pen.

I stamped the main image from the Harlequin Christmas set with Black Stazon Ink and coloured with my Prisma Pencils.  I added glossy accents to the tops of the buildings.   I also added holograph glitter here & there but hard to see in the photo. 

And here are a few 'archived' cards using the Harlequin set.  I posted a couple of these on my blog late last year.  


And below is the Harlequin Christmas set:


Thanks for your visit and have a great day !
Shirley

Thursday, December 06, 2012

Celebrating the Holidays

Hello everyone !   I hope your week has been going well.    It's hard to believe that Christmas is getting close !

I created this card for the challenge at Impression Obsession.   I've used whimsical stamps that are designed by Hannah Davies.     I thought these two love birds look like they are celebrating the holidays together as the challenge is 'celebrating the holidays' .   And for a change I've used red & green (& blue) ! 


Impression Obsession Stamps:   Snowflake C10003, Birds on Holly F10002, & Merry Christmas B10011.

Spellbinder Die:  S4-366

I created the background with Pool, Azure & Silver Smooch Inks.  I over stamped with the snowflake using Smokey Gray Versafine Ink.  

I embossed the cute Birds on Holly and Merry Christmas with Black and used my Tombows to colour.  I stamped on watercolour paper so I could use a brush with water direct to the paper.   I added stickles for highlights. 


Thanks for stopping by and have a great day !
Shirley

Wednesday, December 05, 2012

A Stylized Tree that is published !

Hello everyone -  I hope your week is going well.   It's snowing here this morning which actually looks pretty.  But it's brrrrrrrrrrrrr cold.   

More excitement for me this week !    One of my card designs was published in the Canadian Scrapbookers Basics, Volumne 6, Magazine that was released on December 1st.   This magazine covers stamping techniques by Cathie Allen, it's an excellent reference and my design is printed in the Stamp Smoosh  section.   

This is the card using Design by Ryn and Impression Obsession Stamps.  


The background was created using Pool & Sugarberry Smooch Inks.  If you would like information on creating Smooch Ink backgrounds, I have a Tutorial at this Post.

I over-stamped the background with the small tree from Ryn's Stylized Tree Set with Colorbox  Boysenberry Pigment ink and then stamped again using Ryn's Snowflakes (hard to see in the photo) with Brilliance Platinum Ink randomly over the background.

The large tree from Ryn's Stylized Tree Set was stamped with Boysenberry and embossed with clear.  I cut it out, blended more Pool Smooch Ink around and created a mat behind it.   Christmas Magic B3585 is from Impression Obsession.

Thanks for stopping by and have a great day !
Shirley

Sunday, December 02, 2012

A Steampunk Butterfly and a new Design Team Spot !

Hello everyone, I hope you are enjoying the weekend.    I've been like a little girl jumping & up and down in excitement - it's like I've had lots of "chocolate" :)

I'm a very excited lady to tell you about my wonderful new opportunity.  I've been invited by Glenda the owner of Chocolate Baroque Stamps in the UK to join their Design Team!   I was thrilled to say 'yes' as I've been 'in love' with their beautiful & elegant designs for a long time.   I'm very impressed with the great quality, value and service on orders to Canada.  I'm truly honored to join the team of talented ladies who have given me so much inspiration.  Here is a link to the  Design Team Blog

Chocolate Baroque's December Stamp Set of the Month is Steampunk Butterfly and this is my first design using them.   It's a beautiful set, the stamps have been so much fun to 'play' with.  The Stamp Set of the Month is a newly launched design at a special introductory price.   


To create the background I started with Turquoise Dylusions Ink (sprayed with water, then ink & blotted off with paper towel).   Next I used CraftersWorkshop Mini Gear stencil with Tea Dye Distress Ink (with the Ranger blending tool).   I stamped the beautiful window/wheel fragment with Salty Ocean and then Vintage Photo Distress Inks.   I used a distress tool on the edges of the background. 

I embossed the Deco Corners & Steampunk Butterfly with a metallic embossing power (combo of silver, gold & bronze) and painted with my Tombow markers.  I use water colour paper so I can blend with a brush & water.   And for the finishing touch I added some little cogs & a key that were hanging out in my stash.   I also raided my husband's garage for some copper wire to use for the antennae.

Imagine is from Chocolate Baroque's Artistic Impression Set which I stamped with Walnut Stain Distress Ink.     I use this set a lot, it's very versatile for cards, art journaling and photo lay-outs.

Here is a close up of the card:


And here is a look at the Steampunk Butterfly set.  This is an A5 (half sheet) set.    It's an unmounted rubber stamp set, but it's easy to attach to a sheet of EZMount and cut them out to receive great value.


My new team mates have created awesome designs with these stamps so if you have a chance to visit the Design Team Blog, you'll see new creations posted almost every day.   I'll also be back with more soon !

Well that's my excitement for today, have a great one !

Shirley

Sunday, November 25, 2012

Lace flowers & a Faerie

Hi everyone, I hope you are enjoying the weekend.    All week we enjoyed above seasonal temperatures and sunshine.  But we've had a change - strong winds brought in frosty weather this weekend, and we have light snow coming down !  Yikes I wasn't ready for snow !

I created this card that reminds me of summer using Designs by Ryn stamps.    I used Ryn's two beautiful Flower Lace stamps together with one of her Faeries from the Dancing Faerie Set.   I find it amazing that she hand drew the lace which looks like the 'real thing' when stamped as you can see below. .


The background was created by stamping Flower Lace 1 with Brilliance Platinum Planet Ink over dark purple card stock.  The light is catching the lace at the top so it appears lighter than the bottom, but it's not.

I stamped Flower Lace 2 using Colorbox Midnight & Boysenberry pigment inks, then embossed with clear and cut the flowers out.   The Faerie from the Dancing Faerie Set  was stamped with the Boysenberry Ink and embossed with clear.   I coloured her with Stargazer Micacolor paints.  Her skin is painted lightly which is difficult to see in the photo.  

The leaves are from a Crealies Die - CL CP 06 (actually creates a flower, but I've seen Miranda using them for leaves & I love them).  I also painted them with the same Micacolor paints which are beautiful, mica powder gives a shine that again you cannot see in the photo.

If you have a chance, please stop by Miranda's and Eileen's Blogs, both with lots of inspiration,  who are also on Ryn's Design Team.


Thanks for stopping by and enjoy your day !
Shirley

Thursday, November 22, 2012

Let it Snow !

Hello everyone,  I hope you are having a great week and NO I don't want it to snow ..... Not yet !  I was raking leaves again today, it's sunny & above seasonal, beautiful.   I would like to wish our friends south of the border a very Happy Thanksgiving & Happy Shopping tomorrow ! 

I created this Christmas card a while ago using a cute snowman stamp from Inkadinkado.   I think this image would make a great Clean & Simple one layer card as well.    I also used one of my favourite Cover a Card stamps from Impression Obsession to create the background.


Stamps:
Inkadinkado - 99462 Snowman "Let it Snow"
Impression Obsession - CC035 Cover a Card Snowflakes
 
I started by using the large Snowflake CAC and embossed with white.   I blended Aged Mahogany & Broken China Distress Inks over the background.

The snowman was embossed with silver.   I stamped & embossed the hat twice and cut it out to pop it up.   I blended broken china around the snowman, painted the hat with a red Tombow, added red stickles and holograph glitter.

I layered with red & a rich royal cardstock as shown (that was in my stash and I can't seem to find anywhere), added a rich blue bow & red half pearls.    The centre red piece was embossed with the Snowflake Cuttlebug embossing folder, hard to see in the photo.


Thanks for your visit and I hope we don't see snow until Christmas :)
Have a great day, Shirley

Sunday, November 18, 2012

A Pair of Silver Chocolate Pears

Hi everyone !   Hope you enjoyed your weekend.

I have another Christmas card to share today !    All of the images are from the beautiful Pears & Baubles set by Chocolate Baroque.     I love this set, it includes so many beautiful stamps to create a variety of cards.


I created the background by blending Pool, Azure & Silver Fox Smooch Inks.     After making sure it was dry (I used my heat gun to help speed drying) I over stamped and embossed the pretty tree with silver.

On separate card stock I also embossed the two pears with silver.   Using the Acrylic Block technique I added  Peacock Feathers & then blended Picked Raspberry Distress Inks to add color.    Pink added to blue created the purple.    I also used the wet ink to dye white gauze ribbon to match.

I stamped Happy Christmas with Midnight Colorbox Pigment Ink, embossed with clear and then blended the same two DI over top.    I also blended a little Picked Raspberry DI around the edges of the background.

My post with a tutorial to create backgrounds with Smooch Inks is here.  

Thanks for stopping by and have a great day.    I hope to 'see' you here again soon !
Shirley

Thursday, November 15, 2012

Canvas Collage Workshop

Hi everyone I'm back for a second time today !  My previous post was for the IO Challenge.

I enjoyed another workshop, this time creating a collage on canvas with Karen Ellis owner of the Art House Studio.    Karen designs for The Crafters Workshop & My Stamp Box.  She is also a contributing writer for Canadian Scrapbook Magazine.  It was great to take a class with her, I learned a lot, she coached me along to create something that I am happy with.  Her first words of advice "stop thinking" :) 

I've never done any canvas or collage work so this was a new & exciting experience !   Karen's design for the class used the same Asian Lady (cut from Graphic 45 paper), but everyone's work turned out different.   Karen's sample is stunning which you can see here.    I chose similar colors as I love the vibrancy of them.


This is an 8 x 10 inch piece and it's hard to see all the detail,depth & texture in the photo.  We started with canvas board, added Gesso and then built up in layers.   It's fun to get very inky & gluey.   We used molding paste, joint tape, embellishments, Silks Acrylic paints and more.       It needs to be framed & matted with white which pops the colors.  (Karen had one on hand for us to 'test')

Thanks for your visit and have a great day !
Shirley

Starflowers & Leaves for Fall

Hello everyone, I'm back again today with another card.

I haven't had a chance to participate in the Impression Obsession Challenges for a little while, but today I'm entering into their 'Happy Fall Y'all' challenge.   This card is a little different than my previous Fall themed designs that had a lot of orange, red & browns.  October in Ontario was so beautiful this year, the colours were especially gorgeous.    Sadly our leaves are all down but we've enjoyed time raking in the cool Fall air.     


The folded card stock is purple not black, and the right hand flower is purple not blue.  I have trouble capturing purples, it's my ongoing frustration.  

Impression Obsession Stamps:   Cover a Card Flourishes CC027, Starflowers 3066-LG, Hydrangea Leaf H8466, All Seasons C3534 (quote)

Dies:  Crealies CL CS 02 (flourishes)

I started with adding Dried Marigold and Scattered Straw Distress Ink using the Acrylic Block technique on the background.     Next I  inked up the Hydrangea Leaf with Boysenberry Colorbox pigment ink and 'stamp-kissed' the leaf with the Flourish CAC and then again several times using Colorbox Chianti ink.

The Hydrangea Leaf is a great solid stamp that I "had to have" after being inspired by cards at Miranda's Blog using it.   When I won the $25 shopping from IO at a previous challenge, I included it in my order.  


I stamped & embossed one of the starflowers from the set twice with black, colored with my Tom Bow markers and cut them out and layered with Flourishes Die cuts.


Thanks for your visit and have a great day !
Shirley

Wednesday, November 14, 2012

Celtic Stars, Ghost Stamping & an Award !

Hello everyone, Happy Wednesday !    

A couple of days ago I received the Honor of the Liebster Blog Award from Sue at OlliesMam.      Thank you Sue for thinking of me, I appreciate it !   I've been fortunate to receive this award a few times and have passed it on.  But if you have chance, please visit Sue's Blog to see her beautiful cards.  She is a sweet lady and is on the Design Team for Splodge Away (UK). 

I have another sample for Designs by Ryn using her Celtic Stars again.     This time I tried the Ghost Technique on the background.


I stamped one of the small Celtic Stars from the Celtic Star Set CM-C7 with white Colorbox Pigment Ink.   Next I blended Mowed Lawn, Picked Raspberry & Peacock Feathers Distress Inks over top and then rubbed the images with a paper towel.     We learned this technique at the Magenta workshop but we used Pigment inks and maybe they work a little better.     I don't have the small ink pads but maybe a sponge will work, will try next time !      I stamped over the background with the same star using Colorbox Harbor Pigment Ink.

I embossed the large Celtic Star 3 CM-C5 with black and sprayed green Dylusions ink to color.  I highlighted the star with pink Dylusions Ink using the fine tip Ranger water brush.    I used a small strip cut from the background under the star with black matting.  I have some nice bling in my stash which I used for a finishing touch.  You can see it better in the close-up below.   I also added some holograph glitter with a glue pen in the centres of the stars.  (which look like snowflakes don't they?)   Merry Christmas is from Penny Black 3900H.


So again these are not traditional colors for Christmas but they are fun.

If you have a chance, please stop by Miranda's and Eileen's Blogs, both with lots of inspiration,  who are also on Ryn's Design Team.

Thanks for your visit and hope to 'see' you again soon !
Have a great day,
Shirley

Sunday, November 11, 2012

Workshop - "Magenta Style"

Hello everyone, I hope you are having a great weekend.  We are looking forward to sunshine and 14 (Celsius) today.   Will continue to rake leaves :)

I'm excited this morning, I have 100 followers today !  Thank you Miek for joining as the 100th. !  I also would like to give a big thank you to all my loyal followers and visitors.  I appreciate every single visit and all your kind comments.  I didn't know that blogging was going to be so much fun and that I would 'meet' so many kind & talented people all over the world !    I've been so inspired by all of you, thank you again.

I was very lucky to attend a wonderful workshop yesterday at Crop Circles with Nathalie Metivier from Magenta.   If you are familiar with their stamps, you will know they offer elegant designs.   They also held a 'trunk sale'.... which means, hundreds of stamps etc to tempt us. It was a great workshop and all the ladies in the class are so much fun to be with.   Such a special day !  

I love all the designs & techniques that we worked with.   We were able to choose stamps & colours and used Nathalie's designs.  She is a fantastic teacher !   We created six cards, but finished the last one at home.      All images are Magenta with the exception of the first, it's by Crafty Individuals (distributed by Magenta)

This one I finished last night at home.  Background created using Magenta Stencil & Pigment Inks.  Images coloured with Prisma Pencils.   Butterflies Decoupaged and highlighted with Stickels and Glossy Accents.  The image with the young girl was stamped separately and cut out.

Background created with Nathalie's "Ghost" Technique..... will be using this lots, love it !   The background behind the Weed Image was stamped on Glossy paper after creating a 2nd background with Alcohol Inks. 
Background created with Alcohol Inks and over stamped with Magenta flowers.   Main Image coloured with Prisma Pencils
Hard to see the colours in this one.  We used Perfect Pearls on the background of the tag & coloured by blending Pigment Inks.   The flourish on the tree highlighted with white Prisma Pencil.  The flourish was created also with Perfect Pearls.   Little birds coloured with Distress Markers and highlighted with Glossy Accent.
This was so much fun.  We used chipboard & peel-off stickers, then coloured with Micacolor Paints.  Again we choose our own colours  Everyone's card was different and all had beautiful results.  The background of the frame was coloured with Pigment Inks and over stamped on one side. 
Cool design for opening.  Two folds.
The background again was created using Nathalie's Ghost Technique.  We started with white cardstock !  The image was stamped on glossy paper and coloured with distress markers, water (on craft mat) and brush. 

Well that's "all" for today !    I hope to be back soon.
Thanks for your visit and have a great day,
Shirley

Wednesday, November 07, 2012

Smooch Background Tutorial and another Heart of Lights

Hello everyone, I hope you are having a great week.  It's crispy cold here in Ontario, cooler than normal, but we enjoyed sunshine today.        

I've had another 'play' with Designs by Ryn's beautiful Heart of Lights and 
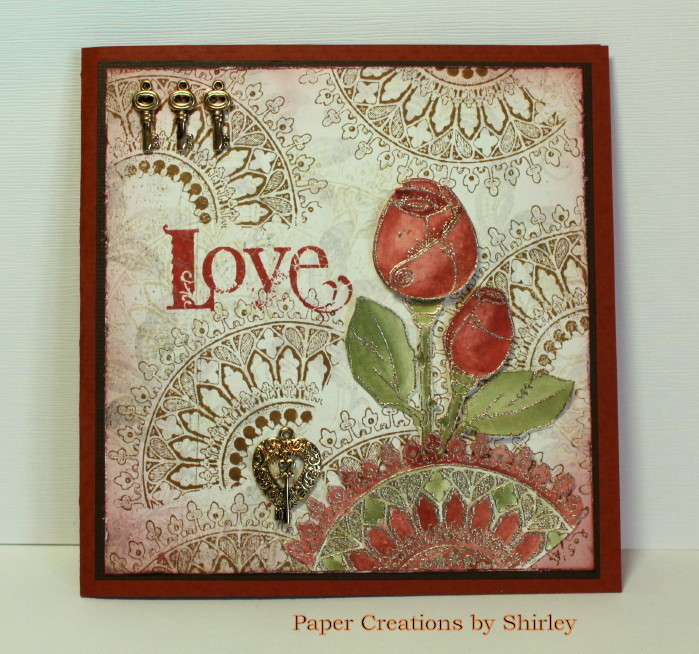
Celtic Star Set.   Again the heart design is very unique as the 'wires' from the Christmas Lights have been drawn into a Celtic Heart. 

I've been asked frequently for instructions to create Smooch backgrounds so I've included a photo tutorial today.  


I embossed the Heart of Lights with black and blended Distress Inks around the image (Milled Lavendar, Shaded Lilac and Dusty Concord).  I used a black Distress Marker around the outside edge after cutting it out with the heart die (Nellies Multi Frames - MFD 022).   I colored the Celtic Heart of Lights with Smooch Inks using the little applicator and added Glossy Accents to create dimension.

The quote is from Impression Obsession (C3505 Miracle). 


Creating backgrounds using Smooch Ink:  

I used Grape Soda, Sugarberry & Pool Smooch Ink.  The bottles may look small, but they seem bottomless.  I've been using the same ones for 2 1/2 years except "Pool" which I've replaced as I use it the most.


I always use a non-stick craft mat under my work. (mine is well used and has spots from using over a rough surface, but it's still fine).    You will need Versamark ink, Smooch inks, Colorbox stylus with the black moldable tip and smooth white cardstock.   I use paper intended for Copic markers.  Baby wipes work well to clean up the applicator after you are done.

Cover the white cardstock with Versamark Ink direct from the pad.  This keeps your surface 'wet' to allow you to blend the inks as they dry quickly.


Start with your lightest colour, Grape Soda.  Shake the bottle well and add the ink using the applicator direct to the stylus.

You need about this much on your stylus.


Start adding to your paper by blending in circle motions.  I leave white spaces for the next color to 'grab'.


I added Sugarberry next.  This is the darkest but since Pool (blue) is an accent, I used it last.  I don't clean my applicator between colors.

 This is what my sheet looked like after adding the second color (Sugarberry).


This is what my background looked like after adding the third colour (Pool).   Smooch Inks have a beautiful sheen as it catches the light.     The colors are not showing true in this photo, it's much more purple. 


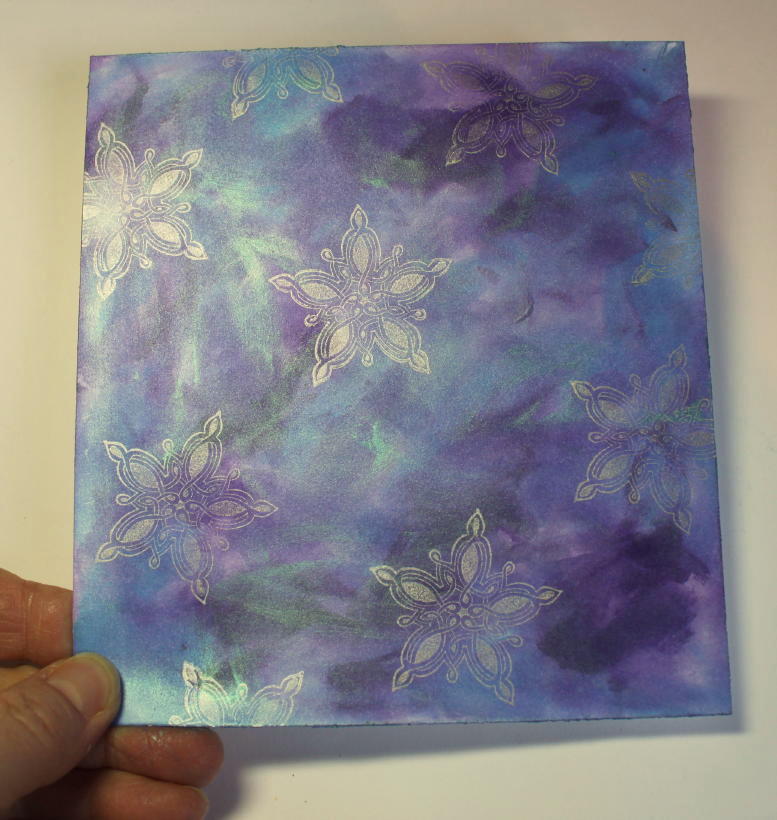
Next I stamped with one of the stars in Ryn's Celtic Star Set using Brilliance Platnium Planet Ink over the background.


Then I stamped the star over the background using Versa Magic Perfect Plumeria Chalk Ink.  And above is the finished background.  Certainly not traditional Christmas colors.


I stamped the quote direct to the background with black Stazon Ink.   After this was done, I wished I had embossed it so that it stands out more.  I added the heart, ribbon and mats.    

If you have any questions, please leave me a comment and I'll reply on the comment page.   I find that if I leave my email address on my blog, I get too much 'wierd' Spam.   I won't talk about what kind I've received.

If you get a chance, please stop by Miranda's and Eileen's Blog who are also on Ryn's Design Team.  They have beautiful blogs with lots of inspiration.  

Thanks for stopping by and have a great day !
Shirley