Showing posts with label Creative Expressions. Show all posts

Tuesday, March 06, 2018

Dreaming about Spring

Hello dear bloggers, I hope you are all doing well.    I'm still not in blogland much but again thought I would show a few things that I've worked on recently.

This first abstract mixed media painting is from a LB2018 Lesson (with Laura Horn), I followed her techniques, but my painting is not like hers, I went my own way.


Next is another whimsical (or stylized) girl using inks (her face has some acrylic):


And finally a couple of cards that I created using Distress Inks, stencils and stamps in the background along with paper flowers that I molded with a stylus.  I used rolled roses in the center of the larger flowers.  So much fun :)


Well again that's enough for one post !

Thanks for stopping by and have a great day,
Cheers
Shirley

Sunday, November 19, 2017

Let it Snow !

Hello and Happy Sunday :)

We woke up to a light snow covering this morning, it was so pretty but it's melted away in the sunshine.

I have a Christmas card to show that was created with an inky background and a lovely large snowflake circle die along with Crealies' flowers, and the words and foliage by Creative Expressions.


Thanks for stopping by and have a great week,
Shirley

Sunday, November 05, 2017

Serena

Hello everyone, I hope you've enjoyed your weekend.  Here it's turned cool and wet, once the house is clean I'm going to play in my craft cave :)

You may have seen this card on Facebook already, I used a favorite stamp by Chocolate Baroque - Serena and added embellishment die cuts by Crealies Flower 13 along with the set of 3 that match  that seem to be discontinued and Creative Expressions (branches).   I thought maybe I went a little overboard on the branches, but couldn't pull them off once they were glued, so I added some white paint to break up the blob of brown.

I started with Tom Bow water colour markers on the image and and then used Prisma pencils on her hair.  I didn't  like how green it was turning out so I used a white Wink of Stella marker and white dots with an acrylic pen which softened the colour to a lighter shade and created a different effect.


I've changed computers and no longer have the free copy of Picasa for adding soft edges and words to my photos.   Does anyone know of a free and SAFE to download software for photo editing or know where I can still find Picasa?  I've seen some links but don't trust them.    I had a trial of Photoshop but it's way too complicated for what I want/need.

Thanks for stopping by and have a great day
Shirley

Saturday, October 28, 2017

Christmas in Pink & Blue

Hello everyone I hope you are doing well.

I have a couple of Christmas cards to show today.     Lots of Distress Inks, stencilling, stamping in the background and use of some Dies by Crealies, Creative Expressions and more ....


Have a great weekend,
Shirley :)

Thursday, June 22, 2017

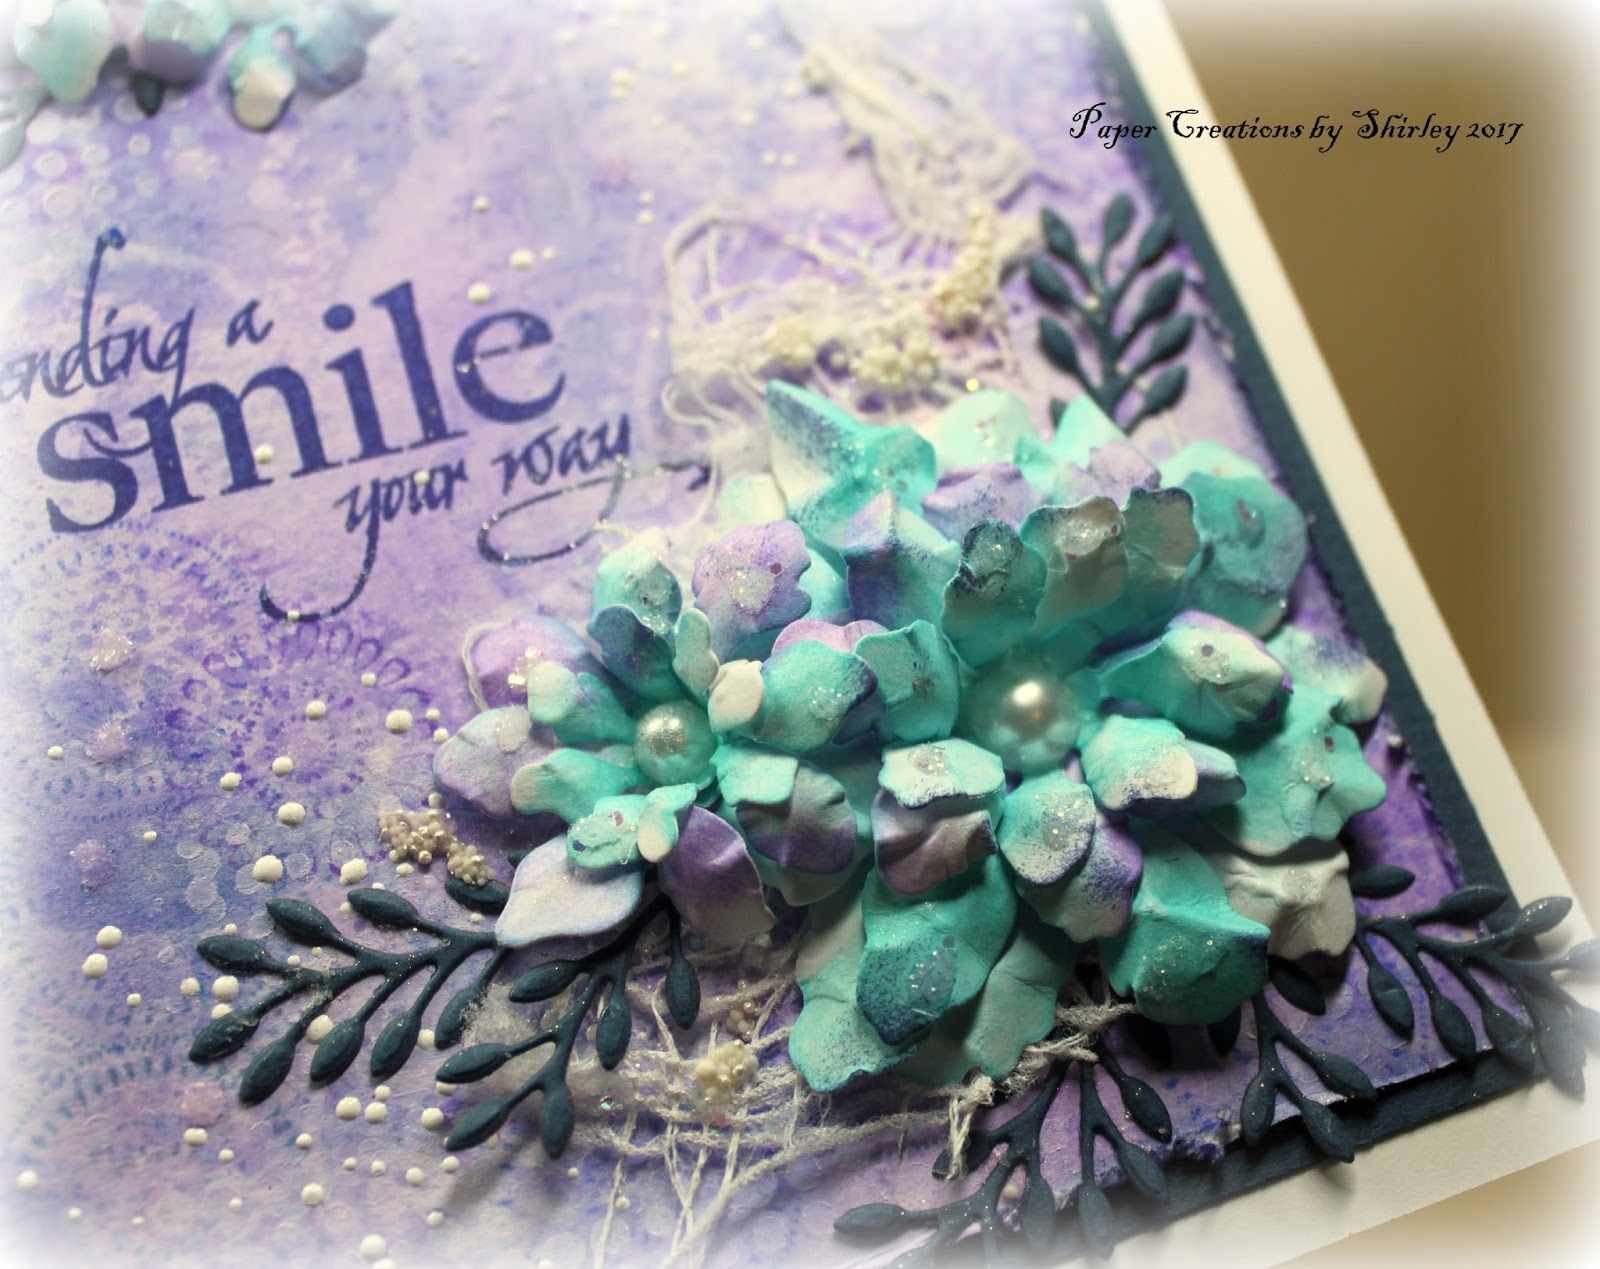
Sending a Smile

Hello everyone, I hope you are doing well.

We are still in packing mode here but I have another card to show that I created recently (before my craft studio was packed up) using Heartfelt Creations Tattered Flowers and Creative Expressions Leaf dies.


The background was created with Distress Inks & water, stamping with water, stenciling with white paint, sprinkled and heated white embossing enamel and gauze painted with Gesso.   I also stamped the background using Design by Ryn's Circle Cluster stamp set.   The sentiment is by Chocolate Baroque but it seems to be discontinued.    Using glue, I added a little Prills and glitter here and there.

The flowers were coloured with Distress Inks, spritzed with water and molded on the back with a stylus and foam mat.


Thanks for your visit, have a great day,
Shirley

Thursday, February 16, 2017

Collage Background and Flowers

Hello everyone I hope you are doing well.

We've received a foot of snow here over the past week, it looks lovely but it wasn't good to drive a couple of days.   However it's going to melt with unusually high temperatures this weekend :)    Sunny warm days are very much appreciated in February.  

I would like to thank my blog friends that left comments with their thoughts about the difference between Blogging and Facebook.  You've made some very good points and I appreciate it very much.  I think overall the consensus is that blogs are more personal.   I still can't see having as much time for blogging but will continue, thanks again :)

I have a couple of cards to show today that I created from the same piece of background to which I added die cuts by Tim Holtz (tattered flowers) and Creative Expressions (the leaves).   I started with collage using tissue, dictionary paper and some Washi tape.  I coloured over with Gesso, dried and then coloured with Neocolour II crayons and then spritzed with water.  After drying I used a wood stamp and white acrylic paint and added some glitter here & there.

I have not purchased the Tim Holtz crayons as I love my Neocolour II and don't feel the need to have two different types.  I have so many mediums to play with already.   On that note, I'm also not going to buy the new Oxide Distress inks, I think having the complete line of Distress Inks and re-inkers is enough along with everything else.  

Well that's all my rambling, here are my cards :)


Thanks for your visit and have a great day!
Shirley

Thursday, November 24, 2016

Gesso Resist Backgrounds

Hello everyone,

I hope you are doing well.   It was warm with summer temperatures on Friday and by Sunday it was below freezing, snowing and very windy.   It's still cold this week but it will get warmer soon. No wonder a lot of us (including myself) are fighting colds.

I was very intrigued with backgrounds that my talented teamie Eileen Godwin created and showed on a recent Facebook post.  Her tutorial (titled Masterboard backgrounds) can be found on Pinterest Part One here and Part Two here.   It's well worth your time to take a look at her blog if you don't already follow her as she posts lots of gorgeous designs here.


I followed Eileen's video tutorial to create the background.   (I used a stencil with white heavy acrylic paint instead of Gesso) and then blended Distress Inks over top.   I like the 'ghost' effect.    I also sprayed the entire card with Glimmermist when finished.

Design by Ryn Products:  Japanese Anemone stencil and Circle Cluster Set.

Flowers dies are by Crealies (Set of 3 No. 17 and Uno No.17) cut from a piece of Gelli print and the Flourish is by Creative Expressions.

And below is a small card that I made with the left over background.


I also used Design by Ryn's Spiral Branch set to stamp and emboss over the background and very faintly stamped with Water Droplets as well (I stamped with archival ink and then wiped over top to lighten which worked well on the semi glossy side of the paper).  The sentiment is by Impression Obsession.

Thanks for stopping by and Happy Thanksgiving to my U.S. blog friends.
Shirleyx

Friday, October 21, 2016

Miracle of Christmas

Hello everyone, I hope you are doing well.

It's a rainy cool day here and I hope to get into my craft room for a while :)   I have another Christmas card to show that features the same background shown in a previous post that I created with Acrylic inks.   I also used Sweet Juliet 'flower' die set by Heartfelt Creations (it's discontinued) and Star Flourish by Creative Expressions.  The text is by Impression Obsession.


Thanks for stopping by and have a great weekend,
Shirley

Saturday, August 13, 2016

Christmas in Greens

Hello everyone, I hope you are have a great weekend.

I had more time to create Christmas cards while it's extremely hot and dry here.  These are a little more traditional using greens.    


The background is various colours of Distress Ink along with the stenciling and stamping.  'Christmas' is from a Tim Holtz stencil, I used some gel gloss and added glitter.  

Dies:
  •   Tattered Poinsettias by Tim Holtz (I love this set)
  •   Star Flourish by Creative Expressions
  •   Ornate 'snowflake' design is by Heartfelt Creations - from the Arianna Lace set to which I added glue and glitter


Below is a smaller card that started with the same background but with different stamping and embossing.


Dies:
  • Tim Holtz's Tattered Poinsettia
  • 'Greeting' is by Tim Holtz from the Holiday Words Script thinlits se
  • Pine branch is a punch by McGill - Designer Pine

Thanks for stopping by,
Shirley

Monday, August 01, 2016

Christmas in Pinks and Purple

Hello everyone, I hope you are doing well.

It's been so hot during the afternoons that it's much more comfortable to be inside with air conditioning and  playing in my craft room.  It may be a bit strange to make Christmas cards during summer, but I have fun getting an early start. 
 

I created a large background and so I had enough for a couple of smaller cards (below).   I used Dylusions sprays and Glimmermist in the background along with some stamping.  The lovely star flourish is by Creative Expressions and the Poinsettias (coloured with Distress Inks, spritzed with water and molded) are Tim Holtz's -Tattered Poinsettia.


And below is a couple of smaller cards (and flatter for mailing) using the same background.  The little stars and bows are by Memory Box.


Thanks for stopping by and have a great week,
Shirley

Sunday, June 05, 2016

Hummingbird and Cornflowers

Hello everyone, I hope you had a a great weekend.    We are getting much needed rain here today, so a perfect time to play in my craft room :)

I used Designs by Ryn's stamps and Creative Expressions Dies for my card below.   I think I have lots of different flower dies, but when I saw this whimsical Cornflower Set by Sue Wilson of Creative Expressions, I couldn't resist.  I think they compliment Ryn's Circle Clusters set.
 

The background started with Distress Inks (Citron, Mowed Lawn and Peacock) on my craft mat, spritzing water and then dragging mixed paper through.   After drying with a heat gun I stamped Circle Clusters with water - a technique that Miranda demonstrates at her tutorial here.

When the background was dry again I over stamped with Mowed Lawn Distress Ink using Circle Clusters and highlighted with a white gell pen.

The beautiful Booted-Racket tail Hummingbird which is also available on Ryn's unmounted Hummingbirds 2 sheet was stamped with Memento Ink, coloured with Distress Inks using a brush and water on my craft mat and Prisma pencils.  I also highlighted with a white gell pen.

Happy Birthday is from Chocolate Baroque's Amazing Birthday clear set which I can no longer find on their website.

I blended Peacock Feathers Distress Ink on the tips of the Cornflower die cuts.   Creative Expressions Dies:  Coneflowers CED1424 and Olive Branch CED1460.  


Thanks for stopping by and have a great week,
Shirley

Wednesday, May 23, 2012

Faerie Poppet 2

Hello Crafters !   I hope your week is going well.  I'm back with a card that I created for one of our Granddaughter's birthday.

I used another fairy from my Faerie Poppet - Fairy 2 set by Creative Expressions &  I managed to use Designer Papers from my stash.  Because I like creating backgrounds with inks & stamps, most of the time my designer papers are sitting here just 'looking pretty'.    But I also love beautiful paper  :)


I stamped one of the fairies from the set onto watercolour paper with Black StazOn Ink.  There is a lot of detail on these stamp designs which I coloured using Tom Bow markers direct to the paper and blending with a brush & water.    I added some holograph glitter to highlight a few areas.    I layered the card & added Crealie leaves & flowers as shown in photo. 

The DP is from a Basic Grey 6x6 pad - Sweet Threads.   I also used Crealies CL CS 12 & CL CS 11 Shapes and CL CF 18 Flowers;   Spellbinders Nestabilities S4-347;  Crafts-Too Embossing Folder - Daisy & Swirl.

That's all for now !
Thanks for your visit, it's appreciated.  Have a great day.
Shirley

Sunday, April 01, 2012

A Faerie Poppet - FYI #26

Hello Crafters,  I hope you are enjoying the weekend.

During our recent vacation in Scotland I was able to visit a lovely Craft Store with one of Jim's (my DH) cousins.    I ended buying a Faerie Poppet stamp set by Creative Expressions.   A nice souvenir of  the UK!  There are 3 sweet Fairies and a couple of sentiments in the set.   These are quite different than any of the stamps in my collection and I was able to get them out this weekend to give them a try.    

While it's close to the April 4th deadline, I'm entering this card into the For your Inspiration Challenge  (FYI Challenge #26).   Visit their Blog to see the beautiful work posted by the Design Team.   This is my first time joining in, but I've been admiring Sylvia's creations, who is a member of their Design Team, for several months.  You can find her designs at her Blog -  Poppy's Papercraft Patch.   


I stamped one of the Faeries from the Fairy 2 set by Creative Expressions onto watercolor paper with Black Stazon ink and colored her with my Tombow markers using water & brushes.   I used the "FYI" photo (see bottom of this post) as inspiration for coloring my Fairy.  The image has a lot of detail, I think she is sweet.   I added lots of holograph glitter to highlight areas and had fun creating flowers with my new Crealie dies.  (I love the Crealies, can't wait to build the collection!) 

Dies used:  Crealie Flowers CL CF 17, Crealie Shapes CL CS 11 and Spellbinder Nestability Label Eight S5-019.   

The green DP is from a 2008 Basic Grey mini pad - 'Boxer'.  Wow it's been here that long ?  At least I only have 1/2 of the pad left.  The burgundy DP is from a K&C Company mini pad - Christmas Cheer. 


Below is the gorgeous photo inspiration for this challenge.   What a beautiful place !  My reds, especially in crealie flowers, are not as orange/red as I would like them to be to match this photo.   However I painted a little orange into a few of the flowers, the wood branches that my fairy is sitting on matches the tree branches below and the greens blend in.   I think this Fairy could be sitting somewhere in this forest :) 


Well that's all for now.   Thanks for visiting and enjoy your day !
Shirley