Hello everyone,
I hope you are doing well. It was warm with summer temperatures on Friday and by Sunday it was below freezing, snowing and very windy. It's still cold this week but it will get warmer soon. No wonder a lot of us (including myself) are fighting colds.
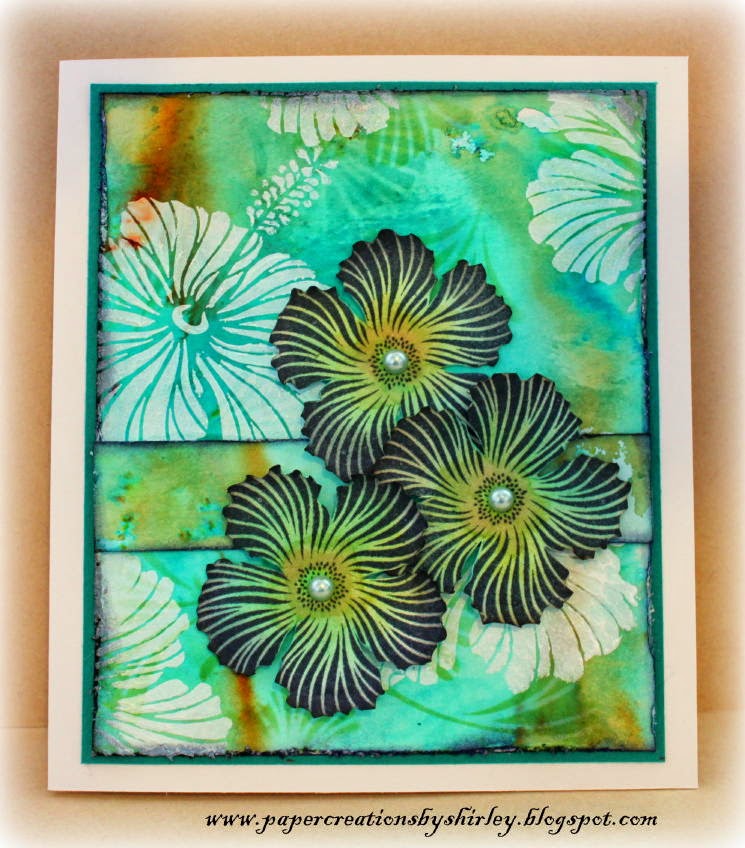
I was very intrigued with backgrounds that my talented teamie Eileen Godwin created and showed on a recent Facebook post. Her tutorial (titled Masterboard backgrounds) can be found on Pinterest Part One here and Part Two here. It's well worth your time to take a look at her blog if you don't already follow her as she posts lots of gorgeous designs here.
I followed Eileen's video tutorial to create the background. (I used a stencil with white heavy acrylic paint instead of Gesso) and then blended Distress Inks over top. I like the 'ghost' effect. I also sprayed the entire card with Glimmermist when finished.
Design by Ryn Products: Japanese Anemone stencil and Circle Cluster Set.
Flowers dies are by Crealies (Set of 3 No. 17 and Uno No.17) cut from a piece of Gelli print and the Flourish is by Creative Expressions.
And below is a small card that I made with the left over background.
I also used Design by Ryn's Spiral Branch set to stamp and emboss over the background and very faintly stamped with Water Droplets as well (I stamped with archival ink and then wiped over top to lighten which worked well on the semi glossy side of the paper). The sentiment is by Impression Obsession.
Thanks for stopping by and Happy Thanksgiving to my U.S. blog friends.
Shirleyx
Showing posts with label Design by Ryn Stencil. Show all posts
Thursday, November 24, 2016
Wednesday, July 13, 2016
Beautiful Moth
Hello everyone, I hope all is well.
I have a card today using a stencil and stamps by Designs by Ryn, including one of her amazing water designs. There are some 'copy cat' companies out there, but Ryn's water stamps are a very high quality and I think the most realistic design.
I truly don't understand how some business owners feel that it's 'OK' to steal someone's designs, it's just morally wrong. I understand that a stamp company may see an opportunity in the market for water designs and create stamps using their own drawings, which is the legal and ethical way to conduct business. (they are out there). However, stealing ideas and designs from a sweet young lady who is managing a small business on her own is just so wrong. We all should know that stealing anything from anyone is wrong.
I could say more, but I'm now off my soap box, rant is over.
I started by using Maidenhair Fern stencil with molding paste. When dry I sprinkled Brusho ink powders, spritzed with Gold Glimmermist and let it run. I like how the gold mica gathered around the raised image.
Lucine the Moth was stamped on separate cardstock, coloured with inks and cut out to attached. I also stamped Hanging Droplets in the background and added the die cut word by Tim Holtz (Sizzix). Ryn's stamps are also available on unmounted sheets at a very good value.
Below is a close up where you can see stickles on the Moth.
Thanks for stopping by and have a great day,
Shirley
I have a card today using a stencil and stamps by Designs by Ryn, including one of her amazing water designs. There are some 'copy cat' companies out there, but Ryn's water stamps are a very high quality and I think the most realistic design.
I truly don't understand how some business owners feel that it's 'OK' to steal someone's designs, it's just morally wrong. I understand that a stamp company may see an opportunity in the market for water designs and create stamps using their own drawings, which is the legal and ethical way to conduct business. (they are out there). However, stealing ideas and designs from a sweet young lady who is managing a small business on her own is just so wrong. We all should know that stealing anything from anyone is wrong.
I could say more, but I'm now off my soap box, rant is over.
I started by using Maidenhair Fern stencil with molding paste. When dry I sprinkled Brusho ink powders, spritzed with Gold Glimmermist and let it run. I like how the gold mica gathered around the raised image.
Lucine the Moth was stamped on separate cardstock, coloured with inks and cut out to attached. I also stamped Hanging Droplets in the background and added the die cut word by Tim Holtz (Sizzix). Ryn's stamps are also available on unmounted sheets at a very good value.
Below is a close up where you can see stickles on the Moth.
Thanks for stopping by and have a great day,
Shirley
Thursday, December 03, 2015
Hummingbird with Blues & a Holiday Gift from Designs by Ryn!
Hello crafty people, I hope you are doing well during this busy month of December.
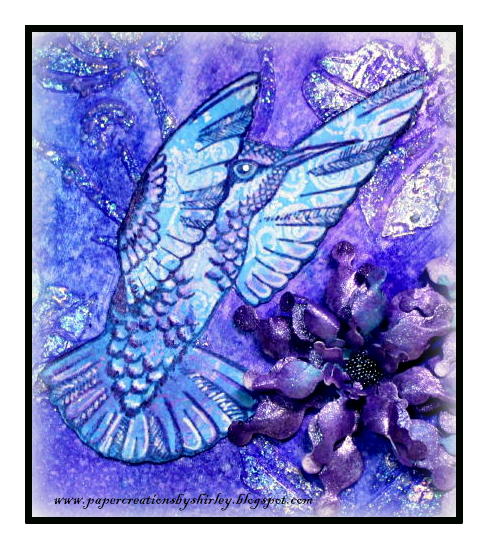
I have a design in blue today, featuring another beautiful Hummingbird from Designs by Ryn. I am not happy how this one photographed so I cropped this first photo.
The Hummingbird available on Designs by Ryn's Hummingbird 1 unmounted sheet was stamped onto a Gelli plate print hanging out in my stash and coloured a little with Tombow markers.
I tried many times to get a proper photograph but will show you the entire design below. The colours are not showing properly and the glimmer and sheen is making it look 'off'. You will have to trust me that it's much better IRL.
The background is Dylusions Inks. I used Ryn's Japanese Anemone stencil with Viva Kristal Gel and Inka gold rubbed over top. The Crealie Flowers are painted with Viva 3D stamp paint (more glimmer).
You can see the flowers better in the photo above. Crealie Die: Creative Flowers CLCF15.
Good news from Designs by Ryn... she is giving away a free Flowing Branches stencil as a holiday gift with every order placed in December. No minimum order, no coupon codes required, just place an order for one or more of her fabulous stamps and/or stencils and she will include this holiday gift. :) Happy dance !
Thanks for stopping by and have a great day
Shirley
I have a design in blue today, featuring another beautiful Hummingbird from Designs by Ryn. I am not happy how this one photographed so I cropped this first photo.
The Hummingbird available on Designs by Ryn's Hummingbird 1 unmounted sheet was stamped onto a Gelli plate print hanging out in my stash and coloured a little with Tombow markers.
I tried many times to get a proper photograph but will show you the entire design below. The colours are not showing properly and the glimmer and sheen is making it look 'off'. You will have to trust me that it's much better IRL.
The background is Dylusions Inks. I used Ryn's Japanese Anemone stencil with Viva Kristal Gel and Inka gold rubbed over top. The Crealie Flowers are painted with Viva 3D stamp paint (more glimmer).
You can see the flowers better in the photo above. Crealie Die: Creative Flowers CLCF15.
Good news from Designs by Ryn... she is giving away a free Flowing Branches stencil as a holiday gift with every order placed in December. No minimum order, no coupon codes required, just place an order for one or more of her fabulous stamps and/or stencils and she will include this holiday gift. :) Happy dance !
Thanks for stopping by and have a great day
Shirley
Friday, October 30, 2015
Playing with Acrylic Inks
Hello creative people I hope you are doing well.
I was playing with Acrylic inks on a tag and ended up adding one of Designs by Ryn's beautiful birds from her Hummingbird 2 unmounted set.
I added copper acrylic paint using Ryn's Maidenhair Fern stencil and white paint using a Memory Box dotty stencil over the background of acrylic inks. The black circles were 'stamped' with a small empty bottle and black acrylic paint.
I coloured the Hummingbird with Tombow markers, cut him out and added white highlights with a pen.
Thanks for stopping by and have a great weekend.
Happy Halloween!
Shirley
I was playing with Acrylic inks on a tag and ended up adding one of Designs by Ryn's beautiful birds from her Hummingbird 2 unmounted set.
I added copper acrylic paint using Ryn's Maidenhair Fern stencil and white paint using a Memory Box dotty stencil over the background of acrylic inks. The black circles were 'stamped' with a small empty bottle and black acrylic paint.
I coloured the Hummingbird with Tombow markers, cut him out and added white highlights with a pen.
Thanks for stopping by and have a great weekend.
Happy Halloween!
Shirley
Wednesday, July 01, 2015
Colourful Snowflakes on Canada Day
Hello everyone, I hope you are doing well. Happy Canada Day to my Canadian followers!
I have a Christmas design today, in non-traditional colours. I enjoy making Christmas cards, it's fun to get started on them early. I love snowflakes and used the beautiful hand drawn Snowflake Set by Designs by Ryn. But I'm not ready for snow for at least six months and we are currently enjoying a lot of warm weather. We've also had more rain than normal in June, the grass, trees and flowers love it.
The background started from a large sheet of mixed media which I sprayed different colours of Dylusions paints.
Next I stamped snowflakes from Snowflake Set using different colours of Distress Ink and embossed with clear. The white embossed snowflakes were last and you can see that some of the detail was lost when I embossed over embossing.
The beautiful die cut snowflakes are by Spellbinder (S4-433). The largest layer was painted with Radiant Gels by ColourArte. I also added Twinkling H2O's over top of the Gel (after dry) and also painted the other layers with the paints: Sky blue, Wisteria, Jasmine and Icicles (which is clear over the white flake). I added some rhinestones to finish it off.
If you enjoy Designs by Ryn's stamp designs you will find inspiration using them at her Facebook Page and at her blog.
I hope you enjoyed a colourful Christmas design in July. Thanks for stopping by and have a great day,
Shirleyx
I have a Christmas design today, in non-traditional colours. I enjoy making Christmas cards, it's fun to get started on them early. I love snowflakes and used the beautiful hand drawn Snowflake Set by Designs by Ryn. But I'm not ready for snow for at least six months and we are currently enjoying a lot of warm weather. We've also had more rain than normal in June, the grass, trees and flowers love it.
The background started from a large sheet of mixed media which I sprayed different colours of Dylusions paints.
Next I stamped snowflakes from Snowflake Set using different colours of Distress Ink and embossed with clear. The white embossed snowflakes were last and you can see that some of the detail was lost when I embossed over embossing.
The beautiful die cut snowflakes are by Spellbinder (S4-433). The largest layer was painted with Radiant Gels by ColourArte. I also added Twinkling H2O's over top of the Gel (after dry) and also painted the other layers with the paints: Sky blue, Wisteria, Jasmine and Icicles (which is clear over the white flake). I added some rhinestones to finish it off.
If you enjoy Designs by Ryn's stamp designs you will find inspiration using them at her Facebook Page and at her blog.
I hope you enjoyed a colourful Christmas design in July. Thanks for stopping by and have a great day,
Shirleyx
Monday, June 22, 2015
Hibiscus and Radiant Gels
Hello everyone, I hope you had a wonderful weekend. I would like to welcome the new followers, thank you for your interest in my blog. And again I would like to thank everyone for your visits and kind comments.
Along with the beautiful Twinkling H2O's, members of Design by Ryn's Design Team also received a jar of Radiant Gels from ColourArte to play with. It's a very cool medium, a dimensional paint with glimmer that you can create texture on your art either by using a stencil or paint using a palette knife to create mounds and peaks. It also blends with other paint when wet, which I found during my experimentation. I'm still learning what it can do and there are many wonderful colours to be tempted by :)
I used Designs by Ryn's - Hibiscus Stencil with the Radiant Gels.
The background is a combination of Distress Paints and inks and some clear embossing. I also used Design by Ryn's fabulous Ginkgo stencil.
I used a palette knife to add the Radiant Gel (African Jade) over Designs by Ryn Hibiscus stencil. I used a heat gun to dry which will cause some bubbling but I was OK with the added texture. Because the colour of the Radiant Gel is close to the background colour the image didn't stand out enough for me so I placed the stencil back over the gel (when dry) and added a little white Acrylic paint.
On this next design below you can see the glimmer of the Gel which I left alone this time :)
I added the Radiant Gel first, let it dry, sprinkled Brusho powders over top and spritzed with water. Next I stamped a few leaves from Design by Ryn's Hibiscus stamp set.
Thanks for stopping by and have a great week,
Shirleyx
Along with the beautiful Twinkling H2O's, members of Design by Ryn's Design Team also received a jar of Radiant Gels from ColourArte to play with. It's a very cool medium, a dimensional paint with glimmer that you can create texture on your art either by using a stencil or paint using a palette knife to create mounds and peaks. It also blends with other paint when wet, which I found during my experimentation. I'm still learning what it can do and there are many wonderful colours to be tempted by :)
I used Designs by Ryn's - Hibiscus Stencil with the Radiant Gels.
The background is a combination of Distress Paints and inks and some clear embossing. I also used Design by Ryn's fabulous Ginkgo stencil.
I used a palette knife to add the Radiant Gel (African Jade) over Designs by Ryn Hibiscus stencil. I used a heat gun to dry which will cause some bubbling but I was OK with the added texture. Because the colour of the Radiant Gel is close to the background colour the image didn't stand out enough for me so I placed the stencil back over the gel (when dry) and added a little white Acrylic paint.
On this next design below you can see the glimmer of the Gel which I left alone this time :)
I added the Radiant Gel first, let it dry, sprinkled Brusho powders over top and spritzed with water. Next I stamped a few leaves from Design by Ryn's Hibiscus stamp set.
Thanks for stopping by and have a great week,
Shirleyx
Thursday, June 18, 2015
Tags using Acrylic Inks and more
Hello creative people, I hope you are doing well. I would like to welcome the new followers and thank everyone for the visits and kind comments.
I have a couple of tags to show today that were fun to create while trying out new techniques. I created the first tag at a workshop while attending the evening Art Specially Event while in the Netherlands.
The background of the tag above was created using Liquitex Acrylic Inks spritzed with water. I dried the first colour before adding the second. However you can blend the colours while wet. The workshop that we sat in, was a 'go with the flow' session, which was fun as we could create our own designs. Sorry I do not know the names of the stamps that I used.
I fell in love with the acrylic inks and had to buy bunch from our local Art Shop when I returned back home. I didn't want to risk broken bottles of acrylic ink in my suitcase if I bought them while away....disaster !
This second tag above was also some experimenting but recently at home. I started with Distress Paints with water. When dry I stenciled over with Distress Ink and Design by Ryn's Japanese Anemone stencil and then embossed with clear over top. I stamped with a Penny Black script stamp (1999L Letter Background) and then added more stenciling and then embossed with gold.
Thanks for stopping by and have a great day,
Shirleyx
I have a couple of tags to show today that were fun to create while trying out new techniques. I created the first tag at a workshop while attending the evening Art Specially Event while in the Netherlands.
The background of the tag above was created using Liquitex Acrylic Inks spritzed with water. I dried the first colour before adding the second. However you can blend the colours while wet. The workshop that we sat in, was a 'go with the flow' session, which was fun as we could create our own designs. Sorry I do not know the names of the stamps that I used.
I fell in love with the acrylic inks and had to buy bunch from our local Art Shop when I returned back home. I didn't want to risk broken bottles of acrylic ink in my suitcase if I bought them while away....disaster !
This second tag above was also some experimenting but recently at home. I started with Distress Paints with water. When dry I stenciled over with Distress Ink and Design by Ryn's Japanese Anemone stencil and then embossed with clear over top. I stamped with a Penny Black script stamp (1999L Letter Background) and then added more stenciling and then embossed with gold.
Thanks for stopping by and have a great day,
Shirleyx
Sunday, June 14, 2015
African Daisies with Twinkling H2O's
Happy Sunday everyone, I hope you had a great weekend. We are still keeping quite busy, but I've had a little more time for creativity.
I have two more designs using Twinkling H2O's by ColourArte combined with stamps by Designs by Ryn. I've been having fun playing with these beautiful watercolour paints and combining them with other media.
The background was created with Distress Inks (Abandoned Coral and Picked Raspberry) using an acrylic plate. I also blended the inks over Design by Ryn's Maidenhair Fern stencil. All of the stamping was done with Archival Ink (Cornflower Blue). The Daisies were painted with Twinkling H2O's (Wisteria, Ruby Red and Poppy). I added stickles and liquid pearls to the flower centres and white embossing enamel on the background.
Design by Ryn stamps: African Daisy, small cluster of water drops from the Textures unmounted sheet.
Hopefully you can see the glimmer from the paints in the close up below:
Next up is African Daisy again with a different colour combo and a background created with Acrylic paints and Gel medium.
I stamped Patio Stone over top of the Acrylic paints and medium with Distress Ink and also embossed it with silver. The larger circles were created with a small bottle and white Gesso and the little circles with a stencil. I also used silver embossing enamel on the background.
The daisies that I embossed with silver, were fancy cut and painted with Twinkling H2O's (Cool Water, Jasmine and Wisteria). I added stickles to the flower centres. I hope you can see the glimmer in paints the close up below:
Thanks for stopping by and have a wonderful week,
Shirleyx
I have two more designs using Twinkling H2O's by ColourArte combined with stamps by Designs by Ryn. I've been having fun playing with these beautiful watercolour paints and combining them with other media.
The background was created with Distress Inks (Abandoned Coral and Picked Raspberry) using an acrylic plate. I also blended the inks over Design by Ryn's Maidenhair Fern stencil. All of the stamping was done with Archival Ink (Cornflower Blue). The Daisies were painted with Twinkling H2O's (Wisteria, Ruby Red and Poppy). I added stickles and liquid pearls to the flower centres and white embossing enamel on the background.
Design by Ryn stamps: African Daisy, small cluster of water drops from the Textures unmounted sheet.
Hopefully you can see the glimmer from the paints in the close up below:
Next up is African Daisy again with a different colour combo and a background created with Acrylic paints and Gel medium.
I stamped Patio Stone over top of the Acrylic paints and medium with Distress Ink and also embossed it with silver. The larger circles were created with a small bottle and white Gesso and the little circles with a stencil. I also used silver embossing enamel on the background.
The daisies that I embossed with silver, were fancy cut and painted with Twinkling H2O's (Cool Water, Jasmine and Wisteria). I added stickles to the flower centres. I hope you can see the glimmer in paints the close up below:
Thanks for stopping by and have a wonderful week,
Shirleyx
Friday, May 15, 2015
Words of Gratitude
Hello everyone, I hope you've had a great week.
I've started to work in a smaller (5 1/2" x 7") Art Journal with lose pages that I'll hook together with metal rings. At some point I will make covers. I haven't had time (or Mojo) to be in my craft room lately, but I did manage to have some fun playing with different mediums to create this page:
I used the following mediums but can't remember the exact steps as I was 'going with the flow'.
The words are from Chocolate Baroque's Words of Gratitude set.
You can see the glitter in the close ups below:
It's Victoria Day long weekend here, enjoy!
Take care,
Shirleyx
I've started to work in a smaller (5 1/2" x 7") Art Journal with lose pages that I'll hook together with metal rings. At some point I will make covers. I haven't had time (or Mojo) to be in my craft room lately, but I did manage to have some fun playing with different mediums to create this page:
I used the following mediums but can't remember the exact steps as I was 'going with the flow'.
- mixed media paper
- Liquitex Acrylic Inks and water
- circle stencil with Gesso and sand texture paste.
- pen & Acrylic ink (around some circles)
- black acrylic paint with Design by Ryn's Floral Spiral Stencil.
- acrylic paints
- Silks Acrylic Glaze
- Distress Crackle Paint.
- I added glitter and micro beads with Gel Medium
The words are from Chocolate Baroque's Words of Gratitude set.
You can see the glitter in the close ups below:
It's Victoria Day long weekend here, enjoy!
Take care,
Shirleyx
Monday, May 04, 2015
Love with Bushos and No Stamping
Hello everyone, I hope you are doing well. Thanks for all your kind words regarding my previous post, it's very much appreciated. I think some people think I'm not going to blog anymore, but I will be and here I am back already! But somehow I need to figure out a way to spend less time at my computer :)
I have a design today that was started while I was on vacation. The main image was created with Design by Ryn's Japanese Anemone stencil.
The background was created with Brushos ink powders. Next I used light molding paste over the stencil and let it dry. When dry I rubbed some Inka Gold wax over top of the flower. I rubbed Distress Ink over a TCW stencil for the words. No stamping on this design !
Thanks for your visit and have a great day,
Shirleyxx
I have a design today that was started while I was on vacation. The main image was created with Design by Ryn's Japanese Anemone stencil.
The background was created with Brushos ink powders. Next I used light molding paste over the stencil and let it dry. When dry I rubbed some Inka Gold wax over top of the flower. I rubbed Distress Ink over a TCW stencil for the words. No stamping on this design !
Thanks for your visit and have a great day,
Shirleyxx
Wednesday, April 01, 2015
Hibiscus Designs
Hello everyone, I hope you are doing well.
I have a couple of designs today that feature Design by Ryn's new gorgeous Hibiscus Flower set (also available with the unmounted Hibiscus set) along with her fabulous Ginkgo and Hibiscus stencils. They all work well together.
I used Distress Inks and Brushos in the background. I used Distress Ink over Ginkgo stencil and then white acrylic paint and the Hibiscus stencil. I stamp the Hibiscus several times on separate card stock with Cobalt Archival ink, cut them out, molded on the back (with stylus and foam mat), coloured with Distress Inks and attached.
I also have another card I used the Hibiscus in the background as well:
The background is a light covering of Pistachio Distress Ink using an acrylic block. Using Ryn's Hibiscus stencil I blended the Pistachio and Seedless Preserves Distress Inks. The little flowers are by Crealie - CLCF22 which I molded and coloured with Distress inks. The little sprigs are from Memory box, Winterberry.
One of my followers mentioned recently that it was unusual to see embellishments on one of my designs. It's true that I don't use them all the time (maybe my style doesn't always suit them), but I do enjoy 'playing' with them. Somehow I've still managed to have a large die collection that needs to be used more - I especially love flowers, leaves and flourishes. Too much stash and not enough time !
Thanks for stopping by, it's a little early but I hope you have a great Easter!
Shirleyx
I have a couple of designs today that feature Design by Ryn's new gorgeous Hibiscus Flower set (also available with the unmounted Hibiscus set) along with her fabulous Ginkgo and Hibiscus stencils. They all work well together.
I used Distress Inks and Brushos in the background. I used Distress Ink over Ginkgo stencil and then white acrylic paint and the Hibiscus stencil. I stamp the Hibiscus several times on separate card stock with Cobalt Archival ink, cut them out, molded on the back (with stylus and foam mat), coloured with Distress Inks and attached.
I also have another card I used the Hibiscus in the background as well:
The background is a light covering of Pistachio Distress Ink using an acrylic block. Using Ryn's Hibiscus stencil I blended the Pistachio and Seedless Preserves Distress Inks. The little flowers are by Crealie - CLCF22 which I molded and coloured with Distress inks. The little sprigs are from Memory box, Winterberry.
One of my followers mentioned recently that it was unusual to see embellishments on one of my designs. It's true that I don't use them all the time (maybe my style doesn't always suit them), but I do enjoy 'playing' with them. Somehow I've still managed to have a large die collection that needs to be used more - I especially love flowers, leaves and flourishes. Too much stash and not enough time !
Thanks for stopping by, it's a little early but I hope you have a great Easter!
Shirleyx
Tuesday, March 24, 2015
Japanese Anemone with Sparkle
Hello everyone, I hope you are doing well.
I have a design to show using Designs by Ryn's new Japanese Anemone stencil. The detail on her stencils is gorgeous.
The background is Turquoise Dylusions, purple Brushos crystal ink and a little Peacock Distress Paint. I stamped Leafy Branch around the parameter. I blended Distress Inks over the stencil and then over top spread Viva Crystal Gel. When dry I added a little more colour with a metallic rub and then outlined the flower and highlighted the leaves with a white Gellyroll pen.
The photo really doesn't do this design justice, but I can't get one that I'm satisfied with.
Thanks for stopping by and have a great day,
Shirleyxx
I have a design to show using Designs by Ryn's new Japanese Anemone stencil. The detail on her stencils is gorgeous.
The background is Turquoise Dylusions, purple Brushos crystal ink and a little Peacock Distress Paint. I stamped Leafy Branch around the parameter. I blended Distress Inks over the stencil and then over top spread Viva Crystal Gel. When dry I added a little more colour with a metallic rub and then outlined the flower and highlighted the leaves with a white Gellyroll pen.
The photo really doesn't do this design justice, but I can't get one that I'm satisfied with.
Thanks for stopping by and have a great day,
Shirleyxx
Friday, March 20, 2015
Selini with Japanese Anemone
Happy Spring !
I have a design today using one of Designs by Ryn's Moths - Selini and and her new stencil - Japanese Anemone. Her moths are gorgeous and now available on a unmounted sheet called Moon Wings and are offered at an excellent price.
Here is a close up:
Thanks for stopping by and have a great weekend,
Shirleyx
I have a design today using one of Designs by Ryn's Moths - Selini and and her new stencil - Japanese Anemone. Her moths are gorgeous and now available on a unmounted sheet called Moon Wings and are offered at an excellent price.
The background was a lot of fun to create. I started with Distress Paints spritzed with water and then let it run. I blended Distress Ink over top with the Japanese Anemone stencil. Next I used white acrylic paint over a Memory Box stencil and stamped rings with the paint and a little bottle lid. I stamped the little dots using a stamp from Magenta but it could easily be done with a marker tip. Really the stamp is more useful if I wanted to emboss the dots. I stamped one of the little water droplets from the Textures sheet. I stamped Selini on a separate sheet, painted with Inktense pencils and acrylic paints. I covered the entire design with gloss gel and highlighted on the wings with stickles.
Here is a close up:
Thanks for stopping by and have a great weekend,
Shirleyx
Thursday, March 12, 2015
Tropical Design with Ryn's new Stamps
Hello everyone, I hope your week is going well. We are happy as it's been above freezing with the sun shining all week. The snow is melting.... yay!
Designs by Ryn has just announced a gorgeous new stamp set - Hibiscus and also three new fabulous stencils which you can see here.
I just had a quick play to create this tropical design below:
I didn't actually mat this up yet as I was rushing to get a post published today.
The background is turquoise Dylusions spray ink along with yellow and purple Brusho crystal powders (sprayed with water and I let it run). I used one of Ryn's new stencils - Gingko with acrylic paint over the background which turned out a bit too dark. I also stamped with one of the smaller flowers from the set over the background.
The Hibiscus flower and leaves were embossed with silver, coloured with Tom Bow markers and cut out to attach.
Below is the complete unmounted rubber set. Ryn will be selling them mounted as well, she is in the process of scroll sawing.
What's really cool is that she designed a Hibiscus stencil to match the above set which will be great fun to use them together.
That's all for the moment, thanks for stopping by,
Shirleyx
Designs by Ryn has just announced a gorgeous new stamp set - Hibiscus and also three new fabulous stencils which you can see here.
I just had a quick play to create this tropical design below:
I didn't actually mat this up yet as I was rushing to get a post published today.
The background is turquoise Dylusions spray ink along with yellow and purple Brusho crystal powders (sprayed with water and I let it run). I used one of Ryn's new stencils - Gingko with acrylic paint over the background which turned out a bit too dark. I also stamped with one of the smaller flowers from the set over the background.
The Hibiscus flower and leaves were embossed with silver, coloured with Tom Bow markers and cut out to attach.
Below is the complete unmounted rubber set. Ryn will be selling them mounted as well, she is in the process of scroll sawing.
Shirleyx
Thursday, November 06, 2014
Amazing Trickling Water and Hanging Droplets
Hello everyone, I hope you are doing well.
I have a design today for Designs by Ryn using her new amazing Hanging Droplets Set and Trickling Water Set 2 stamps. I also experimented with Kristal Gel by Viva and Ryn's Floral Spiral stencil. Ryn has a talent for capturing the 3D look in her original, unique and hand-drawn water effects stamps. See more water designs here in her Texture stamps section.
To create the background I started by using Peacock Feathers Distress Ink with water and an acrylic block. Next I added circles using the same Distress Ink and TCW Circles Explosion stencil.
I used Kristal Gel medium (by Viva) over Ryn's Floral Spiral stencil, when it was dry I sprayed Midnight Dylusions ink, spritzed water and let it run. After drying again I stamped the large stamp from Trickling Water Set 2 and small stamp from Hanging Droplets Set with cobalt Archival ink. I blended Sapphire DI over top here & there with a lettering stencil. I painted the water images a little with Distress Inks, water and a brush (using my craft mat) and highlighted with a white pen. Update: I did not use Gel on the water droplets, the images are amazing, seriously :)
Tuski the Moth was painted with Tombow markers, cut out and popped up. I added lots of glitter to her (him?). You can see the glitter gel below, it acted as a resist to the spray ink.
Thanks for stopping by and have a great day,
Shirley x
I have a design today for Designs by Ryn using her new amazing Hanging Droplets Set and Trickling Water Set 2 stamps. I also experimented with Kristal Gel by Viva and Ryn's Floral Spiral stencil. Ryn has a talent for capturing the 3D look in her original, unique and hand-drawn water effects stamps. See more water designs here in her Texture stamps section.
To create the background I started by using Peacock Feathers Distress Ink with water and an acrylic block. Next I added circles using the same Distress Ink and TCW Circles Explosion stencil.
I used Kristal Gel medium (by Viva) over Ryn's Floral Spiral stencil, when it was dry I sprayed Midnight Dylusions ink, spritzed water and let it run. After drying again I stamped the large stamp from Trickling Water Set 2 and small stamp from Hanging Droplets Set with cobalt Archival ink. I blended Sapphire DI over top here & there with a lettering stencil. I painted the water images a little with Distress Inks, water and a brush (using my craft mat) and highlighted with a white pen. Update: I did not use Gel on the water droplets, the images are amazing, seriously :)
Tuski the Moth was painted with Tombow markers, cut out and popped up. I added lots of glitter to her (him?). You can see the glitter gel below, it acted as a resist to the spray ink.
Thanks for stopping by and have a great day,
Shirley x
Sunday, October 26, 2014
Secrets in the Forest
Hello everyone, I hope you are doing well.
I created this page in my journal for the Art Journal Journey for October Challenge which is "Deep in the Forest". I almost didn't show it as it's such a quick make, but I wanted to participate and time is running out. If you have a chance to visit their blog, you will see lots of wonderful artwork by the talented participants in the challenge.
I recently received a gift from my dear Tante in the Netherlands - a new stamp set designed by Marja for Kico Stamps. In the set is a mysterious tree and I thought it would work well in a forest 'scene' and could be a little 'spooky' for this time of year.
I also used Design by Ryn's Flowing Branches stencil and her Leafy Branch stamp. The tree and mushrooms are from the Kico Stamp Set Plate #60 (designed by Marja).
I wonder what other secrets are in the forests?
Thanks for stopping by and have a great day,
Shirleyx
I created this page in my journal for the Art Journal Journey for October Challenge which is "Deep in the Forest". I almost didn't show it as it's such a quick make, but I wanted to participate and time is running out. If you have a chance to visit their blog, you will see lots of wonderful artwork by the talented participants in the challenge.
I recently received a gift from my dear Tante in the Netherlands - a new stamp set designed by Marja for Kico Stamps. In the set is a mysterious tree and I thought it would work well in a forest 'scene' and could be a little 'spooky' for this time of year.
I also used Design by Ryn's Flowing Branches stencil and her Leafy Branch stamp. The tree and mushrooms are from the Kico Stamp Set Plate #60 (designed by Marja).
I wonder what other secrets are in the forests?
Thanks for stopping by and have a great day,
Shirleyx
Thursday, October 23, 2014
Christmas Magic with a Stencil!
Hello dear blog friends, I hope you are doing well.
All is well here and I'm enjoying more time in my craft 'studio' this week. It's still pink but my sweet husband has built me some great shelving to store my inks on my desks. When the room is painted and reorganized again (not sure when that will happen) I will take photos. I love to see photos of your craft spaces so I will share some here as well.
One of the cards I made this week was this very 'quick make' for Christmas using Design by Ryn stencil and stamps. At the bottom of this post is good news for Ryn :)
I used a tip from Maria to create the background. I took a circle die cut and blended Distress inks around it (move it around the page and change colours). I then used a larger piece of cardstock with a circle cut out as a mask and stenciled inside the circle. I traced the circle with a Gelly Roll Pen and drew the topper. Next I stamped around with Patio Stone and Sea Bubbles. Quick & easy!
Design by Ryn stencil: Floral Spirals
Design by Ryn stamps: Patio Stone and Sea Bubbles
Distress Inks: Evergreen Bough, Mowed Lawn,Squeezed Lemonade, Salty Ocean
Sentiment is by Impression Obsession - B3585
Also good news for Design by Ryn - Her unmounted sheets of stamps and stencils are now sold in following retailers across the world. You can still order single mounted stamps and stencils from her web store.
Austria: Elisabeth's Bastelhaus - http://www.bastelhaus.at/
Germany: Stampellaedle - http://ssl.stempellaedle.de/ shop/
Germany: VR-Creativ - http://vr-creativ.com/
Japan: Zu's Studio - http://zusstudio.typepad.jp/ blog/
Netherlands: De Stempelwinkel - http:// www.de-stempelwinkel.nl/
Switzerland: Atelier Rägeboge - http://www.stempelseite.ch/
United Kingdom: "Oyster stamps" - http://www.oysterstamps.co.uk/
United States: Susana's Custom Art and Card Design - http:// www.susanascustomartandcarddesi gn.com/
Australia: Marker Maniacs: http://markermaniacs.com.au/
That's all for today, thanks for stopping by
Shirleyx
All is well here and I'm enjoying more time in my craft 'studio' this week. It's still pink but my sweet husband has built me some great shelving to store my inks on my desks. When the room is painted and reorganized again (not sure when that will happen) I will take photos. I love to see photos of your craft spaces so I will share some here as well.
One of the cards I made this week was this very 'quick make' for Christmas using Design by Ryn stencil and stamps. At the bottom of this post is good news for Ryn :)
I used a tip from Maria to create the background. I took a circle die cut and blended Distress inks around it (move it around the page and change colours). I then used a larger piece of cardstock with a circle cut out as a mask and stenciled inside the circle. I traced the circle with a Gelly Roll Pen and drew the topper. Next I stamped around with Patio Stone and Sea Bubbles. Quick & easy!
Design by Ryn stencil: Floral Spirals
Design by Ryn stamps: Patio Stone and Sea Bubbles
Distress Inks: Evergreen Bough, Mowed Lawn,Squeezed Lemonade, Salty Ocean
Sentiment is by Impression Obsession - B3585
Also good news for Design by Ryn - Her unmounted sheets of stamps and stencils are now sold in following retailers across the world. You can still order single mounted stamps and stencils from her web store.
Austria: Elisabeth's Bastelhaus - http://www.bastelhaus.at/
Germany: Stampellaedle - http://ssl.stempellaedle.de/
Germany: VR-Creativ - http://vr-creativ.com/
Japan: Zu's Studio - http://zusstudio.typepad.jp/
Netherlands: De Stempelwinkel - http://
Switzerland: Atelier Rägeboge - http://www.stempelseite.ch/
United Kingdom: "Oyster stamps" - http://www.oysterstamps.co.uk/
United States: Susana's Custom Art and Card Design - http://
Australia: Marker Maniacs: http://markermaniacs.com.au/
That's all for today, thanks for stopping by
Shirleyx
Monday, September 29, 2014
Autumn's Vibrant Colours
Hello blogging friends, I hope you had a great weekend. We enjoyed 'summer like' temperatures and lots of sunshine. The leaves are showing gorgeous vibrant oranges early this fall. It
must have something to do with our cool wet summer and recent cold
nights.
I used a couple of Design by Ryn's fabulous stencils and a Fairy stamp to create this Autumn design.
The background was created with Distress Inks using the Acrylic Block technique. I blended Distress Inks over the Flowing Branches stencil and bronze Viva 3D Decor Modelling Creme over the Maiden Hair Fern stencil. I stamped Dragon Fly Faerie with coffee Archival Ink, coloured with Prisma Pencils, cut her out and attached over the background. I also added holograph glitter to her wings. Autumn is from Chocolate Baroque's November Fairy set.
Thanks for your visit and have a great week,
Shirleyx
I used a couple of Design by Ryn's fabulous stencils and a Fairy stamp to create this Autumn design.
The background was created with Distress Inks using the Acrylic Block technique. I blended Distress Inks over the Flowing Branches stencil and bronze Viva 3D Decor Modelling Creme over the Maiden Hair Fern stencil. I stamped Dragon Fly Faerie with coffee Archival Ink, coloured with Prisma Pencils, cut her out and attached over the background. I also added holograph glitter to her wings. Autumn is from Chocolate Baroque's November Fairy set.
Thanks for your visit and have a great week,
Shirleyx
Monday, September 22, 2014
Working with new Stencils in a pink room!
Hello blogging friends, I hope you are all doing well. We are finally settled into our new home, happy to have most of the big projects done, it was a busy summer and suddenly Fall has arrived. We are still working on our new gardens but I finally found time for crafting, which sure feels good :)
I was frustrated one day while still waiting for my 'craft studio' to be painted and decided it could stay pink for a while. I'm not a 'pink girl' and it's the only room in the house that needs re-painting. My husband has been working hard and ran out of time so I unpacked all my boxes, put away the drawers, a new desk was assembled and I'm able to 'play' again!
Ryn from Design by Ryn sent me her fabulous new stencils prior to our move, two were still waiting for me to 'work' with them. What I came up with seems very familiar, either I've created similar designs or I've been influenced by my talented DT teammates. I did have fun and as you can see I've used my 'go to' or 'fav' colour combos !
I used Dylusions inks, gold Glimmermist and Gesso on both Designs.
Design by Ryn stamps above: Sea Bubbles Set and Candra (the Moth)
Design by Ryn stencils above: Flowing Branches (faint) and Maidenhair Fern (with Gesso)
Design by Ryn stamps above: Striped Reed Set. The words are from a freebie from the Craftstamper magazine.
Design by Ryn stencils above: Flowing Branches (with Gesso), Floral Spirals, Maidenhair Fern
It was great to have a creative 'interlude' but I'm back working on gardens and getting ready for a family visit from overseas, so my blogging time is still limited for a while.
Thanks for visiting and have a great week,
Shirleyx
I was frustrated one day while still waiting for my 'craft studio' to be painted and decided it could stay pink for a while. I'm not a 'pink girl' and it's the only room in the house that needs re-painting. My husband has been working hard and ran out of time so I unpacked all my boxes, put away the drawers, a new desk was assembled and I'm able to 'play' again!
Ryn from Design by Ryn sent me her fabulous new stencils prior to our move, two were still waiting for me to 'work' with them. What I came up with seems very familiar, either I've created similar designs or I've been influenced by my talented DT teammates. I did have fun and as you can see I've used my 'go to' or 'fav' colour combos !
I used Dylusions inks, gold Glimmermist and Gesso on both Designs.
Design by Ryn stamps above: Sea Bubbles Set and Candra (the Moth)
Design by Ryn stencils above: Flowing Branches (faint) and Maidenhair Fern (with Gesso)
Design by Ryn stencils above: Flowing Branches (with Gesso), Floral Spirals, Maidenhair Fern
It was great to have a creative 'interlude' but I'm back working on gardens and getting ready for a family visit from overseas, so my blogging time is still limited for a while.
Thanks for visiting and have a great week,
Shirleyx
Monday, July 28, 2014
New Stencils by Designs by Ryn !
Hello everyone, I hope you are doing well.
I love to use stencils when creating backgrounds so I'm quite pleased that Designs by Ryn now has a Stencil Line to compliment her unique Artistic Stamps.
I have several cards to show today featuring the new Floral Spirals stencil. In the first design below I also used Ryn's Spiral Shell stamp.
The background on the card above was created with spraying Dylusions inks and blending Distress Inks with TCW Circle Explosion and Coral stencils over top. I used Design by Ryn's Floral Spirals stencil with Mother of Pearl Viva Modelling Cream. (Note if you use this cream on a stencil, you need to wash it immediately as it dries very fast). I embossed Spiral Shell with gold, painted and decoupaged over the design. The sentiment is from Impression Obsession.
Next I used Ryn's African Daisy and Trickling Water Set stamps with the Floral Spirals stencil.
The background above was created with Distress Ink using the Acrylic block technique and when dry I added white Gesso over top with the Floral Spiral stencil. I stamped the flowers, sentiment & trickling water with Cobalt Archival ink. I used Tombow markers to paint the Daisies and decoupaged over the background. The sentiment is by Impression Obsession.
And finally I have one more design using the stencil with a third technique. First here is the background:
This background above was created by taking the stencil after it was sprayed over another design. I turned it over onto water colour paper. After it was dry I blended Distress Ink over top (the light colour). The result is a 'watery effect'.
I saw the watery background as waves and decided to create a 'sea scene'. I over stamped with Ryn's Spiral Branch and coloured with Gelly Roll pens. I stamped Betta fish on separate cardstock, painted with Tombow markers and highlighted with Gelly roll pens and decoupaged over the background. 'Best Wishes' is from Chocolate Baroque's Mackintosh Sentiments.
Well that's all for today. Thanks for visiting and take care,
Shirley
I love to use stencils when creating backgrounds so I'm quite pleased that Designs by Ryn now has a Stencil Line to compliment her unique Artistic Stamps.
I have several cards to show today featuring the new Floral Spirals stencil. In the first design below I also used Ryn's Spiral Shell stamp.
The background on the card above was created with spraying Dylusions inks and blending Distress Inks with TCW Circle Explosion and Coral stencils over top. I used Design by Ryn's Floral Spirals stencil with Mother of Pearl Viva Modelling Cream. (Note if you use this cream on a stencil, you need to wash it immediately as it dries very fast). I embossed Spiral Shell with gold, painted and decoupaged over the design. The sentiment is from Impression Obsession.
Next I used Ryn's African Daisy and Trickling Water Set stamps with the Floral Spirals stencil.
The background above was created with Distress Ink using the Acrylic block technique and when dry I added white Gesso over top with the Floral Spiral stencil. I stamped the flowers, sentiment & trickling water with Cobalt Archival ink. I used Tombow markers to paint the Daisies and decoupaged over the background. The sentiment is by Impression Obsession.
And finally I have one more design using the stencil with a third technique. First here is the background:
This background above was created by taking the stencil after it was sprayed over another design. I turned it over onto water colour paper. After it was dry I blended Distress Ink over top (the light colour). The result is a 'watery effect'.
I saw the watery background as waves and decided to create a 'sea scene'. I over stamped with Ryn's Spiral Branch and coloured with Gelly Roll pens. I stamped Betta fish on separate cardstock, painted with Tombow markers and highlighted with Gelly roll pens and decoupaged over the background. 'Best Wishes' is from Chocolate Baroque's Mackintosh Sentiments.
Well that's all for today. Thanks for visiting and take care,
Shirley
Subscribe to:
Posts (Atom)