Hello everyone, I hope you are doing well during this busy season. We are enjoying milder weather than normal but I would like to see the sun a little more. December is usually a dreary month but with the cold weather in January the sun comes back.
I have a Christmas design to show that was a lot of fun to create.
Background: Dylusion spray inks and with stencilling and stamping using Chocolate Baroque snowflakes.
Stencils: Tim Holtz Christmas Words THS030 (with Krystal Viva Gel) and Poinsettia THS049 with Distress Ink
Dies: Sizzix (Tim Holtz) -Tattered Poinsettia 658261 and Holiday Greens 658759, Impression Obsession- Reindeer DIE228-G, Memory Box- Winterberry Sprig 98732
I embossed the reindeer antlers and the branches with silver embossing power. I painted the reindeer with Viva 3D stamp paint. The Poinsettia was stamped with Design by Ryn - Sea Bubbles, coloured with Distress Ink and a coat of Distress crackle paint added.
Thanks for stopping by and have a great day,
Shirley
Thursday, December 10, 2015
Sunday, December 06, 2015
My Craft Studio
Hello everyone, I hope you are having a great weekend during this busy season.
I love it when other bloggers share photos of their craft rooms/space, it's so much fun to see where you get creative. Finally I'm ready to share pictures of my space. When we downsized and moved here over a year ago, my craft room was pink as previously it was a two year old girl's bedroom.
This spring my dear husband painted it in two grey tones as it had wainscoting that couldn't be removed. He finished the painting while I was away in the Netherlands visiting family and hanging out at the Art Specially Event. Recently he finished building all the shelves I requested that hold a display of cards along with inks and other mediums that you can see in the photos below.
I took photos as I entered the room and turned around. I didn't open up all the drawers or you would fall asleep looking at everything. I like to be organized so I can find my stash and use it. Some of the drawers are for non crafting things and I also do embroidery so there are drawers and space reserved for that hobby as well :)
Well, I hope you enjoyed the tour of my craft studio which is one of my 'happy places'. I would love to see where you create !
Have a great week,
Shirley
I love it when other bloggers share photos of their craft rooms/space, it's so much fun to see where you get creative. Finally I'm ready to share pictures of my space. When we downsized and moved here over a year ago, my craft room was pink as previously it was a two year old girl's bedroom.
This spring my dear husband painted it in two grey tones as it had wainscoting that couldn't be removed. He finished the painting while I was away in the Netherlands visiting family and hanging out at the Art Specially Event. Recently he finished building all the shelves I requested that hold a display of cards along with inks and other mediums that you can see in the photos below.
I took photos as I entered the room and turned around. I didn't open up all the drawers or you would fall asleep looking at everything. I like to be organized so I can find my stash and use it. Some of the drawers are for non crafting things and I also do embroidery so there are drawers and space reserved for that hobby as well :)
| Opening the door to my space |
| As I walk into the room. I have empty spots on the walls waiting for artwork :) |
| I use a dresser that is a great height for die cutting and stamping. The drawers and cupboards provide extra storage. |
| My craft desk with Distress Inks close at hand. The antique desk drawer is very deep which holds tools, pens etc. |
| I have an 'office' desk that is used as a craft space when I have a crafting buddy over :) The blue bowl has water for our cat who likes to jump up to see what I'm doing and have a drink :) |
| Next to the desk is a closet, no longer used for clothing :) |
| The closet when closed |
| The closet open on LH side....lots of stamps are stored in these drawers along with other tools. I keep embroidery stash in the middle section. |
| Closet open on RH side, more drawers with lots of sheets of Chocolate Baroque stamps :) |
| And of course my craft desk gets messy when working |
Well, I hope you enjoyed the tour of my craft studio which is one of my 'happy places'. I would love to see where you create !
Have a great week,
Shirley
Thursday, December 03, 2015
Hummingbird with Blues & a Holiday Gift from Designs by Ryn!
Hello crafty people, I hope you are doing well during this busy month of December.
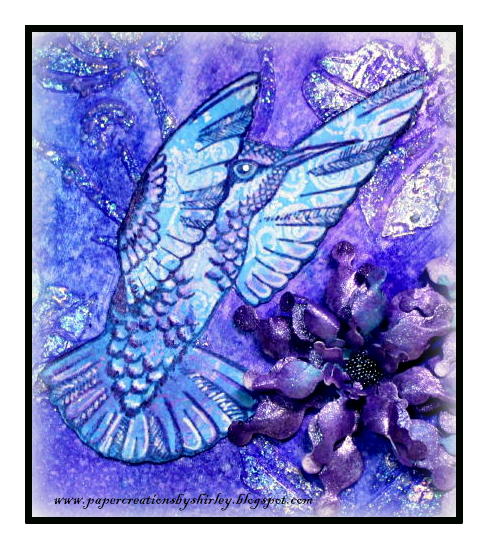
I have a design in blue today, featuring another beautiful Hummingbird from Designs by Ryn. I am not happy how this one photographed so I cropped this first photo.
The Hummingbird available on Designs by Ryn's Hummingbird 1 unmounted sheet was stamped onto a Gelli plate print hanging out in my stash and coloured a little with Tombow markers.
I tried many times to get a proper photograph but will show you the entire design below. The colours are not showing properly and the glimmer and sheen is making it look 'off'. You will have to trust me that it's much better IRL.
The background is Dylusions Inks. I used Ryn's Japanese Anemone stencil with Viva Kristal Gel and Inka gold rubbed over top. The Crealie Flowers are painted with Viva 3D stamp paint (more glimmer).
You can see the flowers better in the photo above. Crealie Die: Creative Flowers CLCF15.
Good news from Designs by Ryn... she is giving away a free Flowing Branches stencil as a holiday gift with every order placed in December. No minimum order, no coupon codes required, just place an order for one or more of her fabulous stamps and/or stencils and she will include this holiday gift. :) Happy dance !
Thanks for stopping by and have a great day
Shirley
I have a design in blue today, featuring another beautiful Hummingbird from Designs by Ryn. I am not happy how this one photographed so I cropped this first photo.
The Hummingbird available on Designs by Ryn's Hummingbird 1 unmounted sheet was stamped onto a Gelli plate print hanging out in my stash and coloured a little with Tombow markers.
I tried many times to get a proper photograph but will show you the entire design below. The colours are not showing properly and the glimmer and sheen is making it look 'off'. You will have to trust me that it's much better IRL.
The background is Dylusions Inks. I used Ryn's Japanese Anemone stencil with Viva Kristal Gel and Inka gold rubbed over top. The Crealie Flowers are painted with Viva 3D stamp paint (more glimmer).
You can see the flowers better in the photo above. Crealie Die: Creative Flowers CLCF15.
Good news from Designs by Ryn... she is giving away a free Flowing Branches stencil as a holiday gift with every order placed in December. No minimum order, no coupon codes required, just place an order for one or more of her fabulous stamps and/or stencils and she will include this holiday gift. :) Happy dance !
Thanks for stopping by and have a great day
Shirley
Sunday, November 29, 2015
Winter Wishes in Green and Yellow
Hello everyone, I hope you are having a great weekend. I've been away from blog land for a little while but back this morning with more Christmas cards:
I normally create 'one of a kind' cards but here is what I would call 'batch' card making, but with some changes. I used a fantastic tree die set from Impression Obsession as the feature on these.
As you can see I varied the colours and lay-outs slightly:
The backgrounds were created on one master sheet using Dylusions spray inks. I blended Distress Inks where I wanted to darken it a little. I over stamped with a snowflake from Chocolate Baroque's A Child is Born. Winter Wishes is from Impression Obsession as well at the Fir Tree Die and Sm Snowflakes Die sets. I added Distress Crackle paint and then glitter over the trees.
Thanks for stopping by and have a great day,
Shirley
I normally create 'one of a kind' cards but here is what I would call 'batch' card making, but with some changes. I used a fantastic tree die set from Impression Obsession as the feature on these.
As you can see I varied the colours and lay-outs slightly:
The backgrounds were created on one master sheet using Dylusions spray inks. I blended Distress Inks where I wanted to darken it a little. I over stamped with a snowflake from Chocolate Baroque's A Child is Born. Winter Wishes is from Impression Obsession as well at the Fir Tree Die and Sm Snowflakes Die sets. I added Distress Crackle paint and then glitter over the trees.
Thanks for stopping by and have a great day,
Shirley
Wednesday, November 18, 2015
A Damask Reindeer
Hello crafty people, I hope you are staying safe and doing well.
I recently ordered another beautiful set of stamps from Chocolate Baroque - Damask Reindeer, it was on my 'wish list' for a long time. I used the set to create another Christmas card that is flat for easier mailing.
I blended Distress Inks over the background with torn card stock. Next I stamped with an image from Dusky Damask that compliments the beautiful pattern on her body to create the ground foliage and a snowflake from Damask Reindeer. I coloured the magical Reindeer with TomBow markers & water, carefully cut her out and attached. I added white embossing enamel (heated underneath) to create snow.
Thanks for stopping by and take care,
Shirley
I recently ordered another beautiful set of stamps from Chocolate Baroque - Damask Reindeer, it was on my 'wish list' for a long time. I used the set to create another Christmas card that is flat for easier mailing.
I blended Distress Inks over the background with torn card stock. Next I stamped with an image from Dusky Damask that compliments the beautiful pattern on her body to create the ground foliage and a snowflake from Damask Reindeer. I coloured the magical Reindeer with TomBow markers & water, carefully cut her out and attached. I added white embossing enamel (heated underneath) to create snow.
Thanks for stopping by and take care,
Shirley
Thursday, November 12, 2015
Friendship gives Wings to the Heart
Hello everyone, I hope you are having a great week.
I have a design today that features another gorgeous Hummingbird from Designs by Ryn and a couple of her amazing water effects stamps.
Background: I blended Twisted Citron, Mowed Lawn and Cracked Pistachio Distress Inks using an acrylic block and water. I added Fozzilized Amber and Mowed Lawn DI with Design by Ryn's Japanese Anemone stencil. I also used a small Magenta dotty and Ryn's Flower Lace stamps with Mowed Lawn but it's hard to see the lace.
Main images: I used VersaFine, Olympia Green, for the main stamping. I stamped the Hummingbird from Hummingbird 1 unmounted sheet separately, coloured with Tombow markers, cut him out and attached. I also stamped with Ryn's Hanging Droplet Set and Trickling Water 2 which are available mounted individually or in unmounted sets.
The sentiment is from Chocolate Baroque's beautiful Pretty Poppy stamp set.
TIP: How to make Designs by Ryn's water effects stamps appear more 3D:
Thanks for stopping by and have a great day,
Shirley
I have a design today that features another gorgeous Hummingbird from Designs by Ryn and a couple of her amazing water effects stamps.
Background: I blended Twisted Citron, Mowed Lawn and Cracked Pistachio Distress Inks using an acrylic block and water. I added Fozzilized Amber and Mowed Lawn DI with Design by Ryn's Japanese Anemone stencil. I also used a small Magenta dotty and Ryn's Flower Lace stamps with Mowed Lawn but it's hard to see the lace.
Main images: I used VersaFine, Olympia Green, for the main stamping. I stamped the Hummingbird from Hummingbird 1 unmounted sheet separately, coloured with Tombow markers, cut him out and attached. I also stamped with Ryn's Hanging Droplet Set and Trickling Water 2 which are available mounted individually or in unmounted sets.
The sentiment is from Chocolate Baroque's beautiful Pretty Poppy stamp set.
TIP: How to make Designs by Ryn's water effects stamps appear more 3D:
- Stamp the image with permanent ink
- Brush a little water over top of the droplet area
- Blot water off with a paper towel to remove some of the colour. I used Distress Inks in the background which are water soluble and will lift up with water and paper towel.
- When dry add highlights with either a white Gelly Roll, Uni-ball or Acrylic pen. On the card above I used a Molotow white acrylic paint pen than Ryn recommended at her Facebook Page.
- Sometimes I add a little colour back into the water droplets but I did not above
Thanks for stopping by and have a great day,
Shirley
Saturday, November 07, 2015
Arianna Blooms
Hello everyone I hope you are doing well.
I have a card to show today in blues and purples and not for Christmas. I love working with paper flowers using die cuts - my collection of dies is growing. My flower dies are mainly from Crealies and Heartfelt Creations.
The background is Dylusions inks, the stamping is Blueprint Distress Ink and then sprayed with Precious Metal Glimmermist. The flower were cut from a Gelli print from my stash and also white cardstock and then coloured with Wilted Violet Distress Ink (love this new colour). I used a stylus and mat to mold the flowers and attached small beads with Glossy Accents.
Stamp: Chapel Road - Flower Words
Dies: Heartfelt Creations: Arianna Blooms (flowers) & Bella Rose (flourish)
Thanks for stopping by, enjoy the rest of the weekend,
Shirley
I have a card to show today in blues and purples and not for Christmas. I love working with paper flowers using die cuts - my collection of dies is growing. My flower dies are mainly from Crealies and Heartfelt Creations.
The background is Dylusions inks, the stamping is Blueprint Distress Ink and then sprayed with Precious Metal Glimmermist. The flower were cut from a Gelli print from my stash and also white cardstock and then coloured with Wilted Violet Distress Ink (love this new colour). I used a stylus and mat to mold the flowers and attached small beads with Glossy Accents.
Stamp: Chapel Road - Flower Words
Dies: Heartfelt Creations: Arianna Blooms (flowers) & Bella Rose (flourish)
Thanks for stopping by, enjoy the rest of the weekend,
Shirley
Tuesday, November 03, 2015
Green and Yellow Christmas
Hello everyone, I hope you are doing well.
I have a few more Christmas cards to show you. Again I created a large sheet for the background, chopped it up and started stamping :)
The background stamping above includes a small Poinsettia by Magenta and Winter Berries by Penny Black. Merry Christmas is from Chocolate Baroque. I stamped on the Tim Holtz Tattered Poinsettia die cuts with Design by Ryn's Sea Bubbles to create some texture. The 'greenery' is from a McGill punch -Designer Pine .
The background stamps above are from Designs by Ryn: Snowflake Set and again the Sea Bubbles which I like to use for 'snow'. I added ornament Die cuts by Memory Box that match the Sea Bubbles and is the reason why I 'had to have it'. I used again the same sentiment by Chocolate Baroque.
Again the small Poinsettia by Magenta is in the background along with Holly by Impression Obsession. Peace and Joy is from a Penny Black set. The star die cuts are by Memory Box.
Thanks for stopping by and have a great week,
Shirley
I have a few more Christmas cards to show you. Again I created a large sheet for the background, chopped it up and started stamping :)
The background stamping above includes a small Poinsettia by Magenta and Winter Berries by Penny Black. Merry Christmas is from Chocolate Baroque. I stamped on the Tim Holtz Tattered Poinsettia die cuts with Design by Ryn's Sea Bubbles to create some texture. The 'greenery' is from a McGill punch -Designer Pine .
The background stamps above are from Designs by Ryn: Snowflake Set and again the Sea Bubbles which I like to use for 'snow'. I added ornament Die cuts by Memory Box that match the Sea Bubbles and is the reason why I 'had to have it'. I used again the same sentiment by Chocolate Baroque.
Again the small Poinsettia by Magenta is in the background along with Holly by Impression Obsession. Peace and Joy is from a Penny Black set. The star die cuts are by Memory Box.
Thanks for stopping by and have a great week,
Shirley
Subscribe to:
Posts (Atom)